A paver driveway apron is the paved section connecting your driveway to the street, and it takes more structural abuse than any other part of your drive because every turning tire wheel scrubs against it. Pavers work well here, but only when they sit on a base built for vehicle loads, not a patio-grade section. Get the base right and the surface material becomes a design choice. Get it wrong and even the best pavers will shift within a season.
TL;DR:
- Proper base depth of 8 to 12 inches with layered compacted gravel is essential for apron longevity, especially under vehicle turning loads.
- Using driveway-rated concrete pavers or permeable pavers provides the best durability for the apron, with thicker units and proper base systems required.
- Most apron issues stem from inadequate base preparation or shallow excavation, leading to shifting, cracking, or premature failure.
- Local permits often restrict apron materials to concrete or specific thicknesses, requiring homeowners to verify regulations before construction.
- Hiring a professional ensures correct base installation, permit compliance, and proper drainage, reducing future repair costs and project delays.
Table of Contents
- What Does a Driveway Apron Actually Do?
- Which Paver Materials Hold Up Best on an Apron?
- How Deep Does the Base Need to Be for a Paver Apron?
- How Do You Build a Paver Driveway Apron Step by Step?
- Do You Need a Permit for a Driveway Apron?
- What Does a Paver Driveway Apron Cost and How Long Does It Take?
- How Do You Maintain a Paver Apron Over Time?
- Why the Base Matters More Than the Pattern
- Get a Paver Apron Built Right the First Time
- Where This Guide’s Specs Come From
- Sources
- FAQ
What Does a Driveway Apron Actually Do?
The apron is the section between the street or sidewalk and where your driveway proper begins. Some contractors call it a driveway transition, an apron pad, or simply “the flare.” Whatever the term is, it does three jobs at once, and homeowners tend to notice only the third one until something breaks.
- Load distribution: cars don’t just roll over an apron, they turn on it. That twisting motion puts lateral shear on the surface that a straight driveway run never experiences.
- Drainage: the apron needs a slope, typically a few percent grade, to move water toward the street gutter or a swale instead of pooling at your garage door.
- Transition and curb appeal: it’s the first thing anyone sees when they pull up, and mismatched materials or a sunken edge make even a nice driveway look unfinished.
Because the apron usually sits partly on public property, it also triggers inspection and right-of-way rules that the rest of your driveway doesn’t. That means the apron often falls under stricter municipal oversight than the driveway body, which affects what materials you’re even allowed to use before you get to pick one.
Which Paver Materials Hold Up Best on an Apron?
Not every paver sold at a landscaping supply yard belongs on an apron. Vehicle traffic and turning stress demand thicker, denser units than what you’d use on a patio, and the difference matters more here than almost anywhere else on your property.
Driveway-rated concrete pavers run 60 to 80 millimeters (2.4 to 3.15 inches) thick, versus the 40 to 60 millimeters common in patio units. Clay brick pavers offer a classic look and excellent color retention, but they cost more and some styles aren’t rated for vehicle loads, so check the manufacturer’s traffic rating before buying. Permeable pavers, which use wider joints filled with open-graded aggregate instead of sand, handle stormwater on-site rather than shedding it to the street, an option some municipalities now require or incentivize.
Here’s how the main choices stack up for an apron specifically:
- Concrete pavers (driveway-rated): best cost-to-durability ratio, wide color and pattern range, individual units are replaceable if one cracks.
- Clay brick: premium look, resists fading better than concrete, but pricier and thinner options need traffic-rating verification.
- Permeable pavers: manage runoff on-site, often satisfy stormwater ordinances, but require a completely different base structure.
- Poured concrete: lower material cost, faster install, easiest to match ADA sidewalk continuity, but the whole slab cracks as one piece and repairs mean a visible patch.
- Asphalt: cheapest upfront and quick to install, but it softens in summer heat and needs resealing every few years.
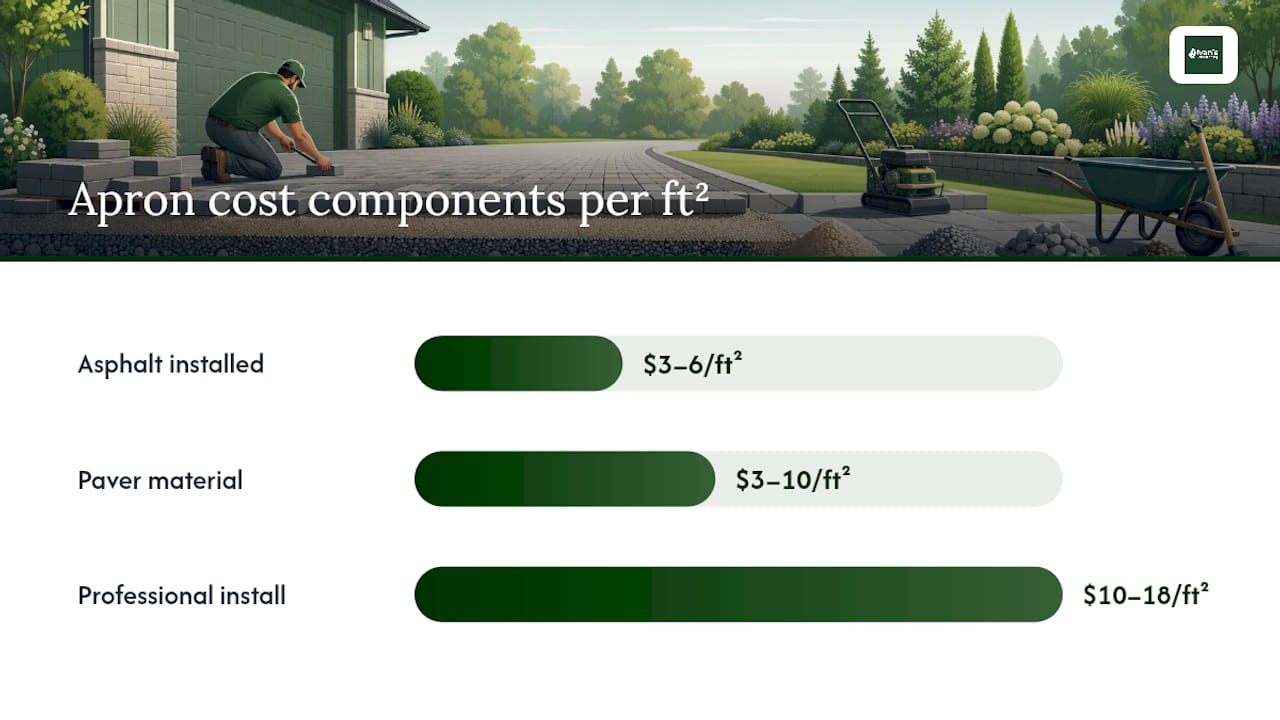
Installed asphalt aprons typically run $3 to $6 per square foot, while paver or cobblestone materials cost $3 to $10 per square foot before labor, with professional installation adding another $10 to $18 per square foot. Pavers cost more upfront, but individual units can be lifted and reset without touching the rest of the surface, something neither concrete nor asphalt can offer. Before committing to pavers, call your local building or public works department. Some municipalities restrict apron materials to concrete only, regardless of what you’d prefer to install.
How Deep Does the Base Need to Be for a Paver Apron?
This is where most DIY apron projects succeed or fail, and it happens below ground where nobody thinks to look until pavers start rocking. Vehicle turning loads demand a base section far heavier than what a walkway or patio needs, and skipping a layer or shorting the depth is the single most common cause of premature apron failure.
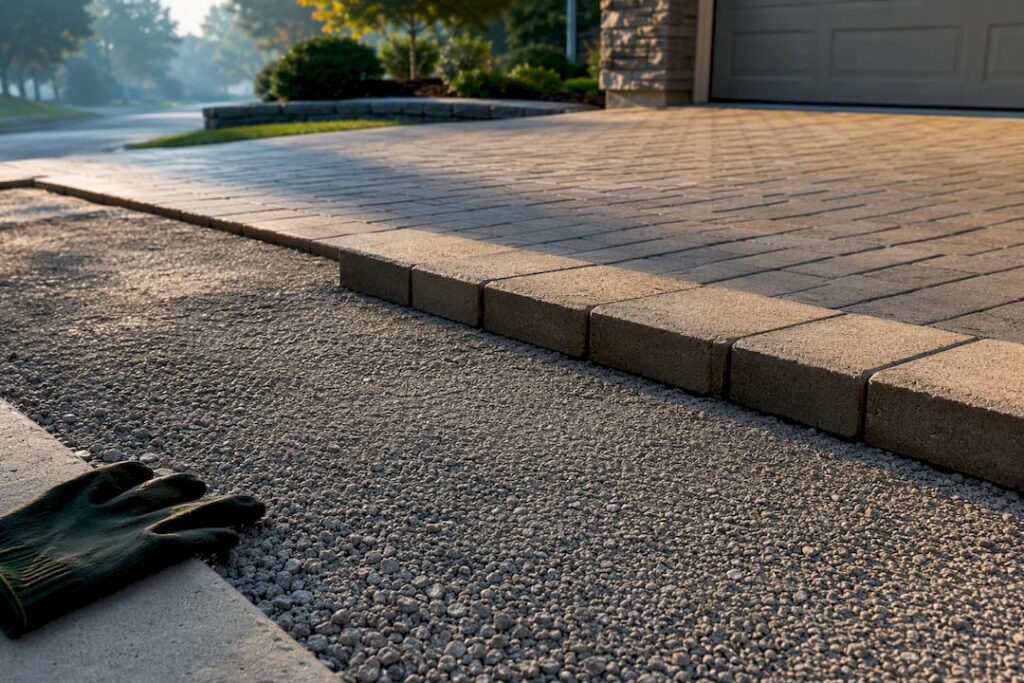
A standard non-permeable vehicular paver section, layered from the bottom up, looks like this:
- Geotextile fabric across the excavated subgrade to stop base material from mixing into the soil below.
- Compacted dense-graded base (crusher run or DGA), 8 to 12 inches deep for driveways, compacted in lifts rather than dumped and packed all at once.
- Optional structural lift of ASTM No. 3 or No. 5 stone beneath the dense-graded base on wet or weak subgrade, which spreads load and improves drainage without a full engineered redesign.
- One inch of ASTM No. 8 bedding stone, screened flat just before the pavers go down.
- Vehicular-rated pavers, set tight with a robust edge restraint locking the whole field in place.
Permeable systems flip the logic: they use open-graded storage stone, a choker course, and open-graded bedding, all designed to let water pass through rather than compact tight. Mixing dense-graded and open-graded layers in the same section defeats the purpose of either system and can cause standing water or structural failure.
Pro Tip: If your soil stays soggy a day after rain, don’t just add more base depth. Add a structural stone lift and confirm drainage with a shovel test before you order a single paver.
How Do You Build a Paver Driveway Apron Step by Step?
Building an apron is a weekend project for a capable DIYer, but the prep work, not the paver laying, is what actually takes the time.
- Locate utilities and confirm permits. Call 811 before digging, and check your city or county’s specs for apron thickness, slope, and permitted materials.
- Measure and mark the apron extent, including the flare width at the street and how it ties into your existing driveway.
- Demolish and excavate. If you’re replacing concrete or asphalt, cut it with a saw first. Over-excavate a few inches beyond your target base depth to account for compaction settling.
- Lay geotextile fabric across the full excavated area, overlapping seams by at least 12 inches.
- Compact the base in lifts, running a plate compactor over each 3 to 4 inch layer before adding the next. Skipping this step is where most amateur aprons go wrong.
- Screed the bedding course of ASTM No. 8 stone to a consistent 1 inch depth.
- Lay the pavers, using a herringbone pattern at 45 degrees near the street edge, since herringbone resists the shear forces from turning tires better than a running-bond pattern.
- Install edge restraint along every exposed edge before final compaction.
- Compact the paver field, then sweep in polymeric or regular joint sand and compact again to lock everything tight.
Give the joint sand a full day to settle before light foot traffic, and hold off on parking a vehicle for at least 24 to 48 hours. For tools, plan on a plate compactor (rentable for roughly $70 to $100 a day), a wet saw for cutting pavers along curves, a rubber mallet, a hand tamper for edges, and a stiff broom for jointing. If you’re cutting old concrete, a rental concrete saw adds another line item but saves hours of hand-breaking.
Do You Need a Permit for a Driveway Apron?
Almost always, yes, because the apron typically extends into the public right-of-way where the city or county owns the pavement, even though you maintain it. That single fact drives most of the paperwork.
- Curb cut permits that specify allowable apron width and how close it can sit to a property line.
- Thickness and material restrictions, since some municipalities require concrete only in the right-of-way regardless of your preference.
- Slope requirements tied to ADA sidewalk continuity, so the apron doesn’t create a tripping hazard or block accessible routes.
- Inspector sign-off or a bond in some jurisdictions before work is considered final.
Call your public works or building department before buying materials, and ask specifically whether pavers are approved for the apron in your jurisdiction. Ask a contractor the same question directly: who pulls the permit, and who’s on-site for the inspection?
What Does a Paver Driveway Apron Cost and How Long Does It Take?
Budget and timeline depend heavily on whether you’re replacing an existing apron or building fresh, and whether your subgrade cooperates or fights you.
- Materials and installation: paver and cobblestone aprons run $3 to $10 per square foot in materials, with professional labor adding roughly $10 to $18 per square foot on top of that.
- Common add-ons: curb cut permits, disposal fees for demolished concrete or asphalt, and occasional traffic control if the apron work blocks part of the street.
- Equipment rental: a plate compactor and wet saw together typically run under $150 to $200 for a weekend, though dump fees for old material can add more than the rental itself.
- Timeline: a DIY apron replacement often fits into a weekend once permits are in hand; a professional crew handling demolition, base work, and paver installation typically finishes in one to three days.
Weigh your decision to DIY against a few honest factors: permit complexity, whether you’ll need to rent a compactor and cutting saw, whether your subgrade is wet or unstable, and how much street disruption you can tolerate while the work is underway.
How Do You Maintain a Paver Apron Over Time?
Most apron failures trace back to the base, not the surface, which is good news because it means the pavers themselves rarely need replacing, just the ground underneath them.
- Top up joint sand every year or two, especially after winter, since freeze/thaw cycles and plowing both work sand loose.
- Let polymeric sand cure fully before wetting, since activating it too early weakens the bond and invites weed growth.
- Watch for edge restraint failure first. A spreading or rocking paver near the border almost always means the restraint has loosened, not that the paver itself failed.
- Inspect after plow season. Snowplow blades scrape harder on aprons than anywhere else on your property.
If a section does settle, the repair is localized: lift the affected pavers, add or re-compact base stone underneath, then reset the pavers and refresh the joint sand.
Pro Tip: If your area sees regular plowing, ask your installer about a slightly deeper joint sand sweep and a heavier edge restraint spec near the street. It costs little extra and saves an entire re-lay in three or four years.
Why the Base Matters More Than the Pattern

Most driveway apron guides spend their word count on paver colors and patterns, and that’s backwards. The base is where 90 percent of apron failures start, and it’s the part nobody sees once the project is finished. If I had to pick one place to over-invest during a build, it’s compaction lifts and edge restraint, not unit selection.
Homeowners also underestimate how often the apron sits in the public right-of-way. That single fact changes your material options, your permit timeline, and sometimes your liability if the work fails inspection. If your site has wet subgrade, heavy delivery truck traffic, or you’re unsure whether local code even allows pavers in that strip, that’s the moment to call a professional rather than push through a DIY weekend. A properly built paver patio or apron holds up because the crew that built it has already made this judgment calls dozens of times.
— Chas
Get a Paver Apron Built Right the First Time
Skipping base depth or guessing at permit rules is how a weekend project turns into a rebuild two winters later. A professional landscaping company handles the parts that trip up most DIY aprons: permit coordination with your local building authority, subgrade grading, and compaction done in proper lifts rather than one quick pass. Every paver and patio installation starts with a site visit where we check drainage, soil conditions, and right-of-way boundaries before recommending a base spec, not just a paver color. You can see how recent aprons and patios turned out on our project gallery, and every job leaves the site clean, no leftover base stone in your lawn, no excuses. If you’d rather hand off the excavation and compaction work to a crew that’s done it across McHenry County since 2008, request a free estimate and we’ll walk your site before you commit to anything.
Where This Guide’s Specs Come From
Base depth and material specs in this guide draw from ICPI-based paver base guidance, Bob Vila’s driveway apron overview, and This Old House’s build walkthrough. Always confirm final thickness and permit language with your local building authority before ordering materials.
Sources
- Driveway Aprons 101: All You Need to Know – Bob Vila
- How To Build a Driveway Apron – This Old House
- Paver Base Material Guide: Crusher Run, #57, #8, #9, and Stone Dust for Pavers – Komplet America
FAQ
What Is the Point of a Driveway Apron?
A driveway apron transitions your driveway to the street while handling turning loads from vehicles and directing water toward the gutter instead of your garage. It also determines how your driveway looks from the curb, which is why mismatched materials stand out immediately.
What Is the Average Cost of a Driveway Apron?
Paver and cobblestone aprons typically run $3 to $10 per square foot in materials, with professional installation adding $10 to $18 per square foot; asphalt runs cheaper at roughly $3 to $6 per square foot installed.
What Is a Driveway Apron Also Called?
Contractors sometimes call it a driveway transition, apron pad, or curb cut area, though “apron” is the term most municipal codes use in their permit language.
How Do You Build a Paver Apron Yourself?
Excavate to the correct depth, lay geotextile fabric, compact a dense-graded base in 3 to 4 inch lifts, screed a 1 inch ASTM No. 8 bedding course, lay pavers in a herringbone pattern, install edge restraint, then compact and sweep in joint sand. If the subgrade is wet or the permit process feels complicated, a paver installation contractor can handle the base work and inspection coordination for you.