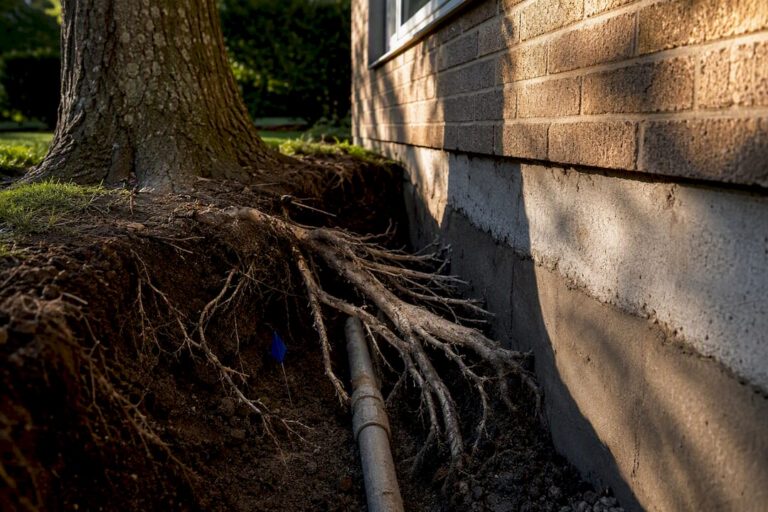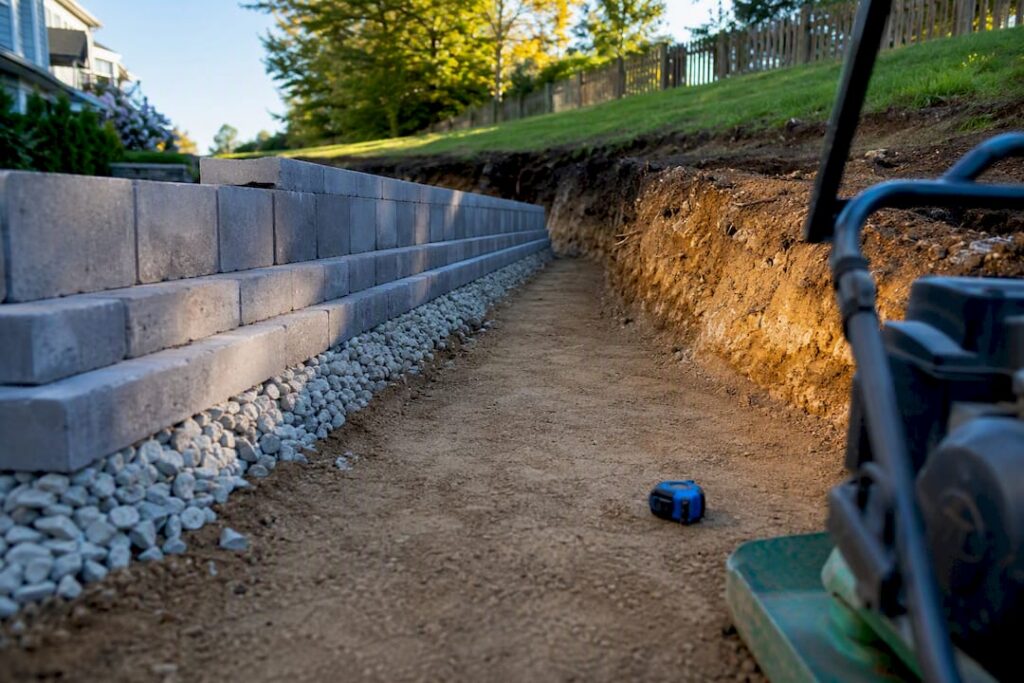
Short garden walls under about 2 to 3 feet, built with segmental units, often get by on a compacted granular base rather than a poured footing. Anything holding back more than roughly 4 feet, sitting near a driveway, working on poor soils, or fighting groundwater needs an engineered footing. If your project fits that second group, your next move is a soil check and a call to a licensed engineer before you dig anything.
TL;DR:
- Most residential garden walls under 4 feet built with segmental units perform adequately on a compacted gravel trench without poured concrete, unless conditions involve poor soil or water issues.
- Taller or load-bearing walls need engineered footings that are sized based on overturning, sliding, and bearing capacity safety checks, often requiring stamped plans and permits.
- Water pressure, especially from hydrostatic buildup, is a leading cause of failure; proper drainage and backfill management are crucial to prevent collapse.
- Soil type, slope, proximity to structures, and groundwater conditions can necessitate engineering regardless of wall height, especially on soft, disturbed, or waterlogged sites.
- A typical concrete footing for taller walls is 50-75% of the wall height in width and about 10% of the height in thickness; design validation and drainage are vital to ensure longevity.
Table of Contents
- When Do You Actually Need a Retaining Wall Footing?
- Footing Types and How to Size Them
- The Three Checks Every Retaining Wall Footing Must Pass
- Drainage and Backfill: Where Most Footings Actually Fail
- Concrete, Rebar, and Base Material Specs Worth Knowing
- Building the Footing: A Step-by-Step Sequence
- When to Call a Licensed Engineer or Contractor
- Why Local Experience Still Matters on Footing Decisions
- An Editorial Take: Rules of Thumb Only Get You Partway There
- How Ivan’s Landscaping Handles Retaining Wall Projects
- Sources
- FAQ
When Do You Actually Need a Retaining Wall Footing?
The decision hinges on five factors: height, soil type, slope, surcharge load, and water. Most homeowner projects fall into one of two camps, and knowing which camp you’re in before you break ground saves a lot of rework later.
Wall height is the first filter contractors use. Garden walls under 3 feet, built from segmental retaining wall (SRW) block, generally perform fine on a compacted base trench with no poured concrete underneath. Once you cross into the 4-foot range, engineered footing design is usually needed and in many places requires stamped drawings near that wall height.
Soil and site conditions can override the height rule entirely. A 3 foot wall on soft clay, a slope, or holding back a loaded driveway behaves nothing like a 3 foot wall on stable, well-drained soil. Watch for these conditions:
- Soft, expansive, or previously disturbed fill soil that hasn’t been engineered
- A slope above or behind the wall that adds lateral pressure (surcharge)
- Proximity to a driveway, patio, or structure whose weight presses on the retained soil
- Standing water, a high water table, or a spring that keeps the backfill saturated
- A location in a region where frost depth extends several feet below grade, since footing embedment often has to sit below the frost line rather than at a shallower structural depth
Any one of these conditions can push a “simple” wall into engineered-footing territory, regardless of how short it looks.
Footing Types and How to Size Them
Two footing styles cover almost every residential retaining wall: the compacted base trench used under segmental block, and the poured concrete cantilever footing used under taller or structurally loaded walls.
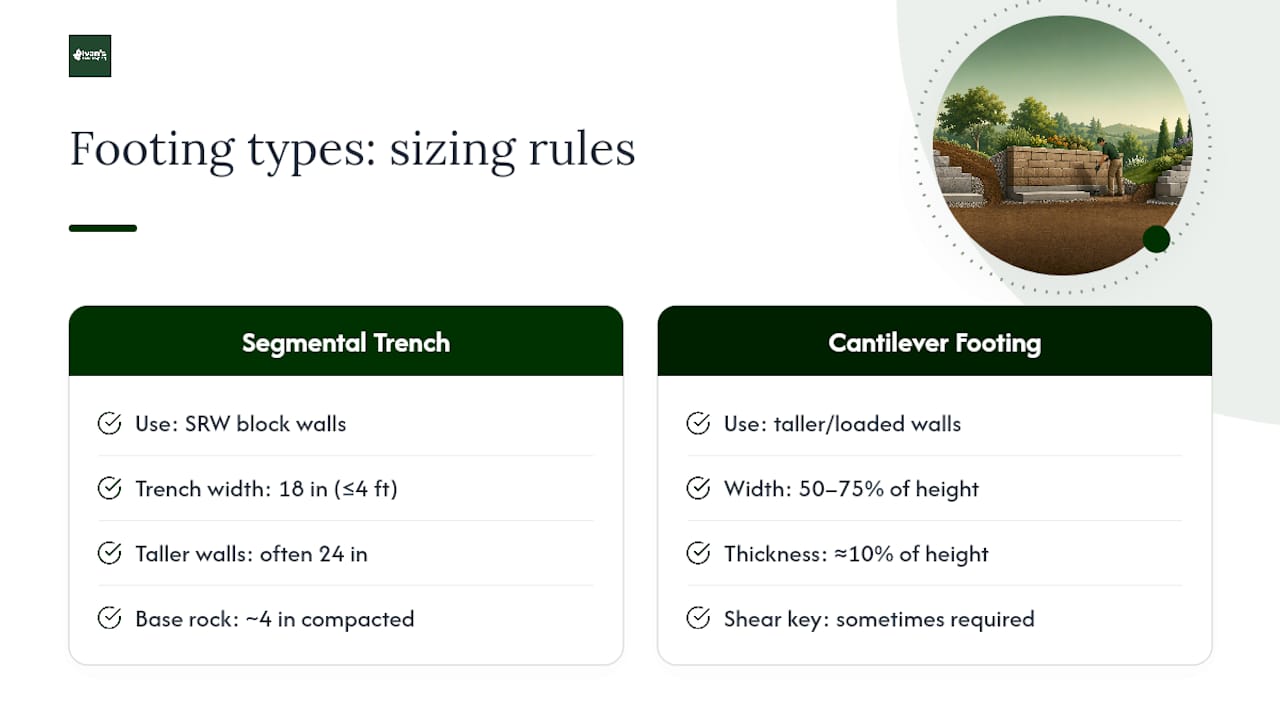
Segmental base trenches are the standard for SRW block walls. Allan Block’s installation guidance calls for an 18-inch wide trench for walls under 4 feet, with about 4 inches of compacted wall rock beneath the first course. Taller walls need a wider trench, often 24 inches, to spread the load and keep the base from shifting under freeze-thaw cycles. Base material should be compacted in thin layers, and the Allan Block spec book calls for compaction to 95% Standard Proctor density before the first block ever goes down.
Cantilever poured footings work differently. They rely on the weight of the footing and the soil sitting on top of it to resist the wall tipping over. A widely used starting point is a footing width equal to 50 to 75% of the wall’s exposed height, with footing thickness running around 10% of that height.
Pro Tip: A 6-foot wall using that 50 to 75% rule points to a footing somewhere between 3 and 4.5 feet wide, and about 7 inches thick before any adjustment for soil bearing capacity or surcharge. That’s a planning number, not a final design.
Taller cantilever walls, or walls facing high lateral loads, sometimes need a shear key. This is a short concrete lip cast into the bottom of the footing that digs into the soil below, adding resistance against sliding beyond what friction alone provides.
The Three Checks Every Retaining Wall Footing Must Pass
Every legitimate footing design, whether it’s a homeowner’s spreadsheet or a stamped engineering drawing, has to clear the same three stability checks before anyone pours concrete.
Overturning asks whether the wall will rotate forward around its toe. The soil pressure behind the wall creates a tipping force, and the weight of the wall plus the soil on the heel resists it. Engineers typically target a factor of safety around 1.5 for overturning.
Sliding asks whether the whole wall will slide forward across the base of the footing. Friction between the footing and the soil beneath it, plus any shear key, has to outweigh the horizontal push from the retained soil, again usually with a minimum factor of safety around 1.5.
Bearing capacity asks whether the soil under the footing can actually support the pressure the wall places on it without settling unevenly. This is where a geotechnical soil report becomes valuable rather than optional.
Sitting underneath all three checks is the eccentricity rule, sometimes called the middle-third rule: the resultant force on the footing has to land within the middle third of the base width, expressed as e ≤ B/6. Miss that window and the footing starts to lift on one edge, concentrating pressure on the other and inviting cracking or rotation.
- Overturning: resisting moment ÷ overturning moment ≥ 1.5
- Sliding: resisting force ÷ driving force ≥ 1.5
- Bearing pressure: applied pressure ≤ allowable soil bearing capacity
- Eccentricity: e ≤ B/6 (within the middle third of the footing)
An engineer running these numbers will ask for soil bearing pressure, unit weights of the soil and backfill, any surcharge load, and the depth to the water table. Los Angeles County’s retaining wall plan review checklist requires exactly these calculations.pdf), which gives homeowners a useful template even outside that jurisdiction. A structural primer on shear and passive resistance offers a deeper look at how sliding resistance actually develops if you want to go past the basics.
Drainage and Backfill: Where Most Footings Actually Fail
Water pressure, not soil weight, causes more retaining wall failures than any other single factor. A footing designed correctly on paper still fails if water builds up behind the wall and adds hydrostatic pressure the design never accounted for.
- Run a perforated drain pipe along the base of the wall, sloped at a minimum of 1% toward a daylight outlet, so water has somewhere to go instead of pooling against the footing.
- On clay or other poor-draining soils, install a chimney drain (a vertical column of gravel) or a full blanket drain behind the wall face, using clean, open-graded aggregate that won’t clog. Allan Block’s water management guidance specifies this setup for non-granular infill soils.
- Wrap drain aggregate in filter fabric to keep fine soil particles from migrating into the gravel and choking the drain over time.
- Place backfill in lifts of roughly 8 to 12 inches, compacting each lift before adding the next, rather than dumping the full backfill depth at once.
- Keep heavy equipment away from a freshly built wall until the structure and footing have had time to gain strength; backfilling is the phase where most field failures start, often from compaction equipment working too close to the wall too soon.
Concrete, Rebar, and Base Material Specs Worth Knowing
Footing performance comes down to a handful of material choices, and knowing the numbers helps you evaluate a contractor’s proposal or a supply order.
- Concrete strength: most residential footings use 3,000 to 3,500 psi concrete, with a slump suited to the forms and reinforcement density rather than a thin, overly wet mix.
- Rebar: #4 or #5 rebar in a grid pattern is standard, with spacing typically between 12 and 18 inches depending on wall height and footing thickness.
- Concrete cover: rebar needs adequate cover from the soil face, generally at least 3 inches for footings poured against earth, to resist corrosion over time.
- Base rock: an open-graded, well-compacted aggregate under the footing spreads load and improves drainage; fines-heavy material holds water and defeats the purpose.
- Filter fabric: placed between base rock and native soil to stop soil migration into the drainage layer without blocking water flow.
Building the Footing: A Step-by-Step Sequence
Getting a footing right is less about any single step and more about not skipping one. Here’s the order that actually holds up in the field.
- Mark wall alignment with stakes and string, call for a utility locate, then excavate down to firm, undisturbed bearing soil rather than stopping at a convenient depth.
- Compact the trench bottom, add and compact base rock in lifts, and check that the base is level and at the correct depth relative to frost line and finished grade.
- Build formwork to the planned footing width and thickness, set rebar on chairs to maintain cover, and double check bar spacing before the truck arrives.
- Pour concrete, vibrate or rod it to eliminate voids around the rebar, and finish the top surface so the wall units or wall stem key in cleanly.
- Cure the footing for several days, per the concrete supplier’s guidance, before placing any load on it, including the first course of wall units.
- Install the drain pipe on gravel at the base of the wall, then backfill in compacted lifts, finishing with final grading that sheds surface water away from the wall.
Pro Tip: Walk the trench with a level and a flashlight before you pour anything. A footing poured on soft or loose spots you can’t see in daylight is one of the most common, and most preventable, causes of early cracking.
When to Call a Licensed Engineer or Contractor
Some situations call for a stamped design and a permit, full stop. Walls over about 4 feet, walls retaining a sloped fill above them, walls near driveways or foundations, and walls on soft or waterlogged soil all belong in this category, even when local code doesn’t explicitly demand a permit at that height.
Before hiring anyone, ask for a soils report if the site history is unknown, calculations showing the factors of safety for overturning and sliding, and stamped drawings you can hand to your local permit office. A contractor experienced with retaining wall and drainage work will usually walk the site, note surcharge and drainage conditions, and tell you upfront whether engineering fees are likely before pricing the job. For a broader sense of what a solid contractor proposal should include, comparing scope and line items across bids matters more than comparing bottom-line price alone.
- Wall height exceeds roughly 4 feet
- The wall retains a slope or supports a driveway, patio, or structure above it
- Soil reports show soft, expansive, or previously disturbed fill
- Groundwater or a seasonal spring keeps the backfill saturated
Why Local Experience Still Matters on Footing Decisions
Retaining wall failures that show up on service calls almost always trace back to a footing that skipped compaction, drainage, or both. Site prep, base compaction, drain installation, and the finish work on paver or stone facing all get inspected as one job, not handled piecemeal. Recent retaining wall and hardscape projects reflect that same sequence on properties with widely different soil and slope conditions.
An Editorial Take: Rules of Thumb Only Get You Partway There
The internet is full of footing size charts that treat “50 to 75% of wall height” as if it were a finished answer. It isn’t. That range is a starting point for a conversation with an engineer, not a substitute for one, and the gap between those two things is exactly where most footing failures start.
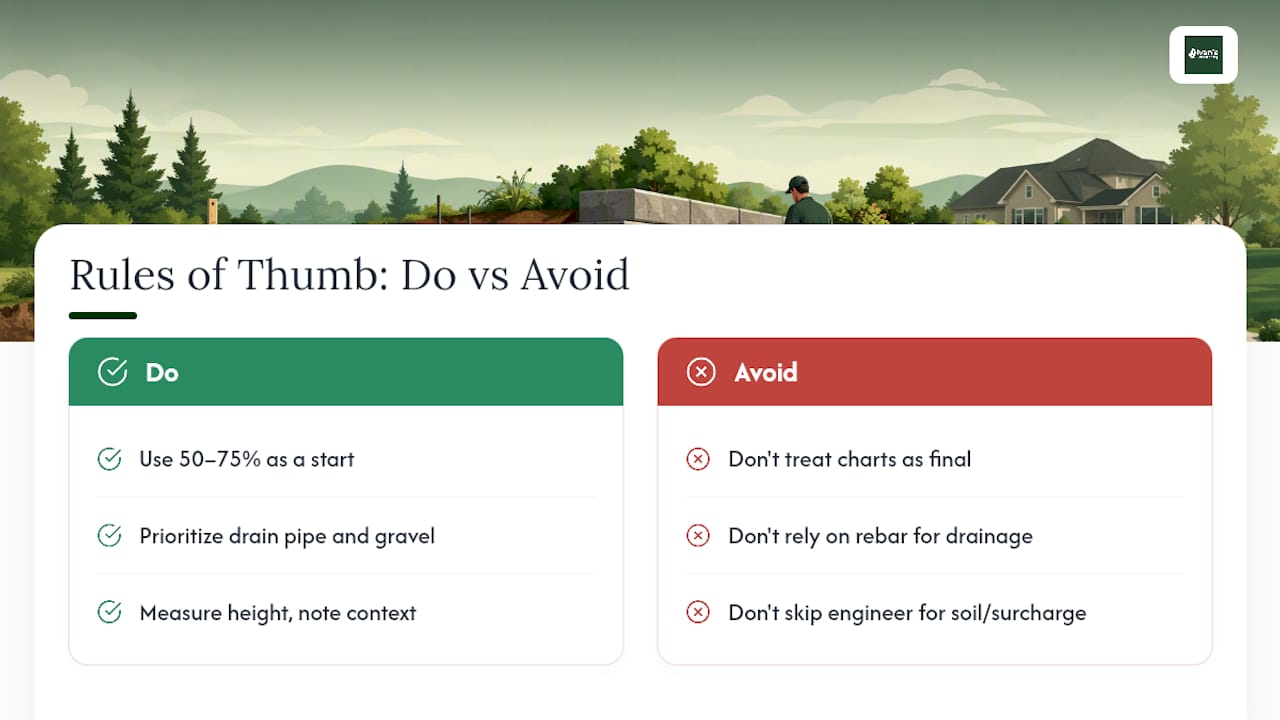
What conventional advice underplays is drainage. Homeowners fixate on concrete thickness and rebar spacing because those numbers feel concrete, literally. Meanwhile, water pressure behind an undrained wall can generate lateral force that dwarfs what the soil alone would produce, and no amount of rebar fixes a drainage problem. If you take one thing from a footing design conversation, make it the drain pipe and the gravel behind the wall, not just the concrete underneath it.
The other place homeowners get overconfident is height. A 3.5 foot wall on flat, well-drained soil is a different animal from a 3.5 foot wall holding back a sloped yard next to a driveway. Height is the easy number to measure. Surcharge and soil type are the ones that actually decide whether you need a stamped drawing.
— Chas
How Ivan’s Landscaping Handles Retaining Wall Projects
Retaining wall contractors design and build retaining walls for homeowners, ranging from segmental garden walls to taller structures that need engineered footings and permits. Where a project crosses into engineering territory, expect that scope, and the added cost of stamped drawings, to be flagged upfront rather than buried in a change order later. If your yard has a slope, standing water, or a wall that’s already showing cracks or lean, a site visit tells you more in twenty minutes than another hour of online reading will. Request a free estimate and get a straight answer on what your specific soil and slope actually require.
Sources
- Allan Block — Basic installation (base preparation and drainage)
- Build-Construct — How to pour concrete footings for a retaining wall
FAQ
What is the proper footing for a retaining wall?
It depends on wall type and height: segmental block walls under about 4 feet use a compacted gravel base trench, while taller or structurally loaded walls need a poured concrete footing sized by overturning, sliding, and bearing checks.
What is the 1/3 rule for retaining walls?
It refers to the eccentricity or middle-third rule, which requires the resultant force on the footing to fall within the middle third of the base width (e ≤ B/6) to avoid uneven pressure or lifting on one edge.
What is the rule of thumb for retaining wall footing size?
A common starting point for cantilever footings is a total width of 50 to 75% of the wall’s exposed height, with thickness around 10% of that height, though these figures always need validation against actual soil bearing data.
What is the best foundation for a retaining wall?
For short segmental walls, a compacted granular base trench works well; for taller or engineered walls, a reinforced poured concrete footing sized to pass overturning, sliding, and bearing checks is the standard, and a contractor like Ivan’s Landscaping can help determine which applies to your site.