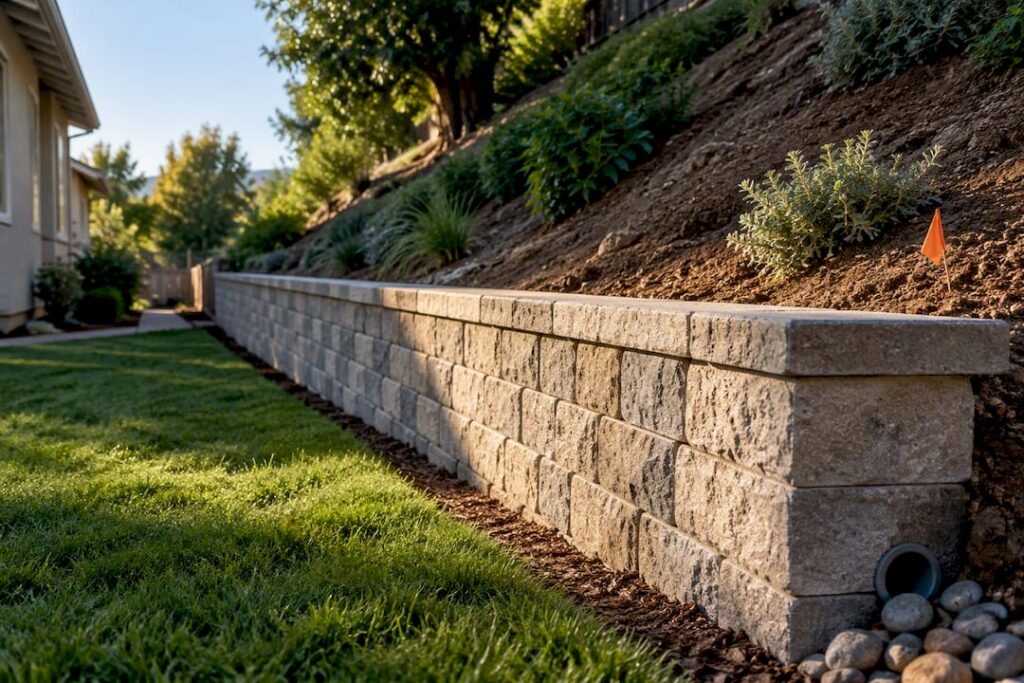
For most sloped yards, the safest practical approach is a stepped, compacted-gravel-based segmental or timber gravity wall with clean-stone drainage behind it. Walls under about 4 feet with balanced soil usually handle this without engineering help. Taller walls, added surcharge, or unstable soil call for geogrid reinforcement or a licensed engineer. Poor drainage, not a weak block, causes most failures we see.
TL;DR:
- Proper drainage and embedment are more critical than material choice, especially for walls over 4 feet or in unstable soils, requiring reinforcement or professional help.
- Building on slopes involves careful site assessment, stepped trenching, and diligent drainage installation, including geotextile fabric and perforated drain pipes, to prevent hydrostatic pressure buildup.
- Most failures stem from poor drainage rather than block weakness, making reinforced drainage crucial for taller or surcharge-loaded walls, especially on grades steeper than 3:1.
- DIY projects can handle walls under 3 feet in ideal conditions, but taller or steeper walls should always involve engineering checks or permits to ensure stability and safety.
- Contractors emphasize that proper base preparation, drainage, and a realistic assessment of hillside conditions are essential, as slope and soil type directly influence wall design and durability.
Table of Contents
- Choosing the Right Retaining Wall Method for a Slope
- How Do You Build a Retaining Wall on a Slope?
- Why Do Sloped Walls Need Different Engineering Than Flat Ones?
- When Do You Need a Permit or a Professional?
- What Ivan’s Landscaping Has Learned Building on McHenry County Slopes
- A Contractor’s Honest Take on DIY Retaining Walls
- Get a Free Estimate for Your Sloped Yard Project
- Sources
- FAQ
Choosing the Right Retaining Wall Method for a Slope
The material you choose matters less than how well it drains and how it’s embedded into the hill. Here’s how the common options stack up for sloped yards:
- Segmental block (dry-stacked interlocking units): The most forgiving DIY option. Manufacturer-designed lips or pins handle setback automatically, and repair or extension later is straightforward.
- Geogrid-reinforced segmental walls: Needed once height, surcharge, or slope steepness pushes lateral pressure past what gravity alone resists. Geogrid ties the wall into the soil mass behind it, and it’s a job most DIYers can handle with guidance, though the layout math gets less forgiving.
- Timber gravity walls: Cheaper and quick to install, but timber rots, especially where slope water concentrates against it. Fine for low walls (under 3 feet) with excellent drainage; a poor long-term bet for taller runs.
- Poured concrete: The strongest and longest-lasting option, but it demands forms, reinforcement, and usually a permit. Rarely a realistic weekend project.
Avoid mortared stone or unsupported timber walls above 3 to 4 feet. Without engineering, they concentrate stress at weak points and tend to bulge or topple within a few seasons.
How Do You Build a Retaining Wall on a Slope?
Building on a hill isn’t the same job as building on flat ground. The sequence below keeps each course level even when the grade underneath isn’t.
- Assess the site. Measure the retained height at its tallest point, locate buried utilities, check for groundwater seepage, and note whether you’re working in clay, sand, or mixed fill.
- Start at the low point and step up. Dig a level trench at the lowest elevation, then step the trench up in full-course increments as you move uphill. This keeps every run level instead of tracking the slope, which is exactly what VERSA-LOK’s installation guide recommends for sloped sites.
- Excavate only what you need. Dig for the leveling pad and embedment depth, not the whole hillside. Compact the subgrade with a plate compactor, and never build on loose, soft, wet, or frozen soil.
- Lay the base material. Use angular crushed stone, 4 to 6 inches deep for low walls. For segmental block, embed roughly one-tenth of the exposed wall height below grade, and increase that embedment where the toe sits on a downslope or the soil is soft, per VERSA-LOK’s design guide.
- Install drainage before you build up. Line the excavation with geotextile fabric, run a 4-inch perforated drain pipe sloped to a daylight outlet, and backfill the 12 inches directly behind the wall with clean, washed stone. Compact backfill in layers as you go.
- Set the first course dead level. Everything above depends on it. Check alignment and batter (the slight backward lean many systems build in) before moving to course two.
- Build up, checking every course. Use the manufacturer’s interlock or pin system, and stagger joints between courses like brickwork. Save capstones for last, once the structural courses are locked in.
- Do a final walkthrough. Confirm the drain pipe actually discharges somewhere useful, make sure nothing heavy (a shed, a hot tub, parked vehicles) sits within the surcharge zone above the wall, and trace where surface runoff will travel during a storm.
Pro Tip: Buy 10% more base stone and drain rock than you calculate. Slopes eat extra material fast once you start leveling out low spots, and running short mid-pour costs you a whole afternoon.
Why Do Sloped Walls Need Different Engineering Than Flat Ones?
A slope behind a wall adds weight and pressure that a flat backfill never applies, so the same wall height on a hill needs more embedment and often a longer reinforcement grid than it would on level ground.
Every retaining wall, sloped or not, has to pass four stability checks:
- Sliding: Does the wall’s base friction resist the horizontal push of the soil behind it?
- Overturning: Does the wall’s weight and footing width keep it from tipping forward?
- Bearing: Can the soil under the wall support its weight without settling unevenly?
- Global slope stability: Could the entire hillside, wall included, slide along a deeper failure plane?
That last one gets overlooked constantly. A wall can pass its sliding and overturning checks and still fail if the slope mass behind it slips as a unit, which becomes a real concern once grades exceed roughly 2:1 or when tiered walls stack slope changes on top of each other, according to engineering standards documented by RWPS.
You’ll often hear the “1/3 rule,” the idea that a wall shouldn’t be built on soil sloped more than one foot of rise for every three feet of run above it. Treat that as a planning guideline for deciding whether you need help, not a code requirement. Nicolock notes that modern segmental systems rely on manufacturer engineering tables above about 4 feet, regardless of what the 1/3 rule suggests.
Common safety-factor targets used in practice: sliding FS around 1.5, overturning FS around 2.0. (RWPS engineering standards)
Get a soil report or bring in a professional engineer (PE) whenever the wall exceeds 4 feet of exposed height, carries any surcharge load, sits within a few feet of a structure or property line, or rises on ground that’s already showing slope movement.
When Do You Need a Permit or a Professional?
Most jurisdictions borrow language similar to IBC Section 1807.2, which requires stability against overturning, sliding, foundation pressure, and water uplift. In practice, that means:
- Unbalanced fill height near 4 feet is the most common trigger for requiring a PE-stamped design.
- Any surcharge load (a driveway, patio, deck footing, or parked equipment above the wall) lowers that threshold.
- Proximity to structures, property lines, or septic systems usually forces a permit review regardless of height.
- Local slope-hazard zones may require engineered design even for shorter walls; some municipal bulletins spell out separate sloping-backfill tables, as Poway’s retaining wall bulletin does.
- Clay soils, high groundwater, long unbroken runs, or visible cracking and slippage on the existing slope are red flags that mean call a professional before you dig.
A qualified engineer will run the stability checks, size the embedment and any geogrid layers, order soil testing if needed, and coordinate inspections at the footing and drainage stages.
What Ivan’s Landscaping Has Learned Building on McHenry County Slopes
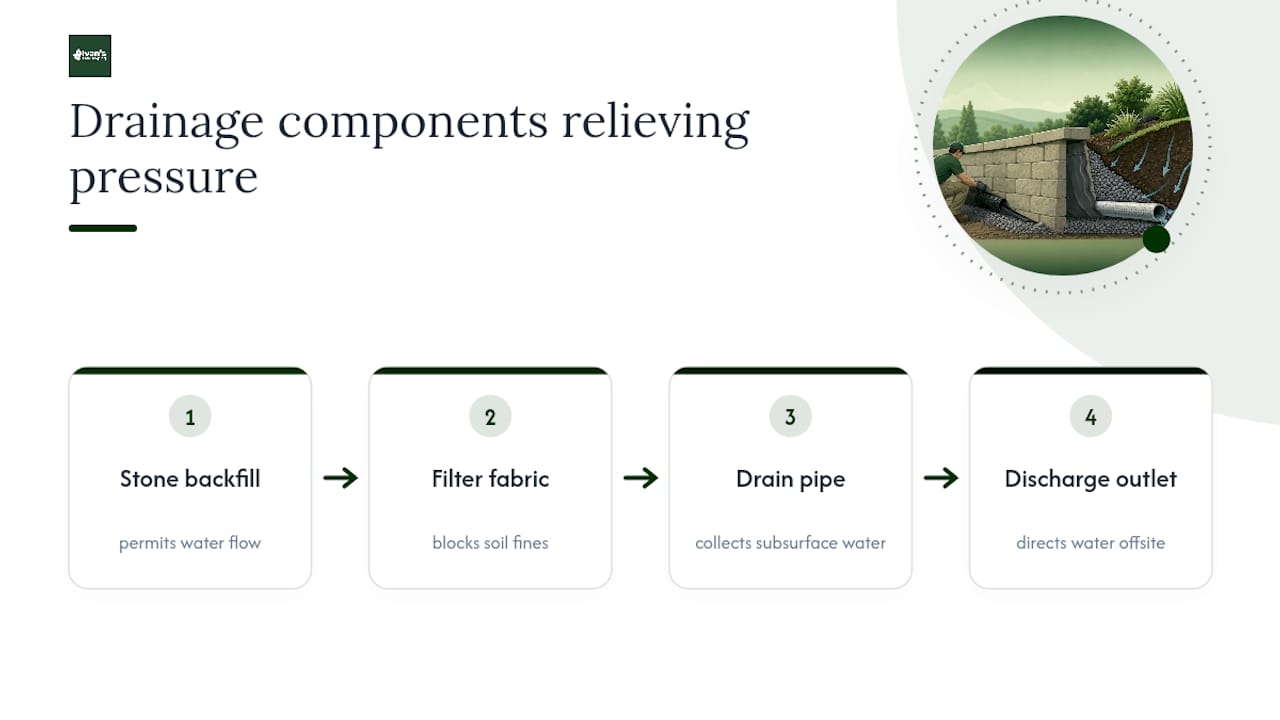
We treat drainage as part of the wall’s structure, not an afterthought. Clean stone backfill, filtration fabric, and a working discharge outlet on every drain pipe are non-negotiable on every job, because hydrostatic pressure buildup behind a wall is the single fastest route to bowing and collapse.
A local landscaping company has been building hardscapes and grading solutions in the McHenry County area since 2008. Drainage and grading work, paver patio tie-ins, and full landscape design and installation make up a steady share of our project calendar, and you can see examples of that recent work firsthand. Sloped lots in this region tend to carry heavier clay content than homeowners expect, which is exactly the condition where DIY drainage shortcuts turn into a rebuild two years later.
A Contractor’s Honest Take on DIY Retaining Walls
Small, well-drained walls under 3 feet are genuinely reasonable DIY projects. Anything taller, steeper, or sitting on questionable soil stops being a weekend project and starts being a liability. Spend your effort on the base and drainage, not the cap style. Nobody notices a beautiful cap on a wall that’s leaning by year three.
— Chas
Get a Free Estimate for Your Sloped Yard Project
Building a retaining wall correctly on a slope means excavation equipment, compaction tools, and drainage materials most homeowners don’t keep on hand, along with the judgment to know when a hillside needs more than a weekend fix. Ivan’s Landscaping handles that heavier lifting directly, pairing drainage and grading work with wall construction so the slope above and below your new wall actually sheds water the way it’s supposed to. We back every job with a satisfaction guarantee, respond fast on free estimates, and leave job sites clean when the work wraps. If your yard has a hill that’s giving you trouble, or you’re planning a wall that ties into a future paver patio, request a free estimate and we’ll walk the site with you before you commit to a plan.

Sources
For code language, consult UpCodes’ retaining wall section. For embedment and installation specifics, see the VERSA-LOK design guide.
- VERSA-LOK installation & design guide
- Retaining wall engineering standards: design & code guide | RWPS LLC
- Weep and drain techniques for retaining walls | RockSupremacy
FAQ
Does a 2-Foot Retaining Wall Need a Footing?
Most 2-foot segmental block walls only need a compacted gravel base 4 to 6 inches deep, not a poured concrete footing. Concrete footings become necessary when you’re building with mortared stone or block, since rigid materials can’t flex with minor soil movement the way dry-stacked systems can, according to DIY project guidance for small retaining walls.
How Steep of a Slope Requires a Retaining Wall?
There’s no single universal cutoff, since it depends on soil type, usable yard space, and erosion risk, but many homeowners start considering a wall once a grade exceeds roughly a 3:1 slope (one foot of rise for every three feet of run). Anything approaching 2:1 usually needs a global stability check regardless of wall height.
What Is the 1/3 Rule for Retaining Walls?
The 1/3 rule is a rough planning heuristic suggesting a wall shouldn’t sit on backfill sloped more than one foot of rise for every three feet of run. It’s useful for deciding whether to worry, but modern segmental wall design relies on manufacturer engineering tables, not this rule, once walls approach 4 feet.
How Do You Get Rocks to Stay on a Slope?
Loose rock or riprap stays put on a slope when it’s set into a compacted base, keyed into the toe of the hill, and backed by filter fabric that stops soil from washing out between the stones. Without that fabric and a proper toe, rock migrates downhill after the first heavy rain, which is the same drainage-first principle that keeps built retaining walls from failing.