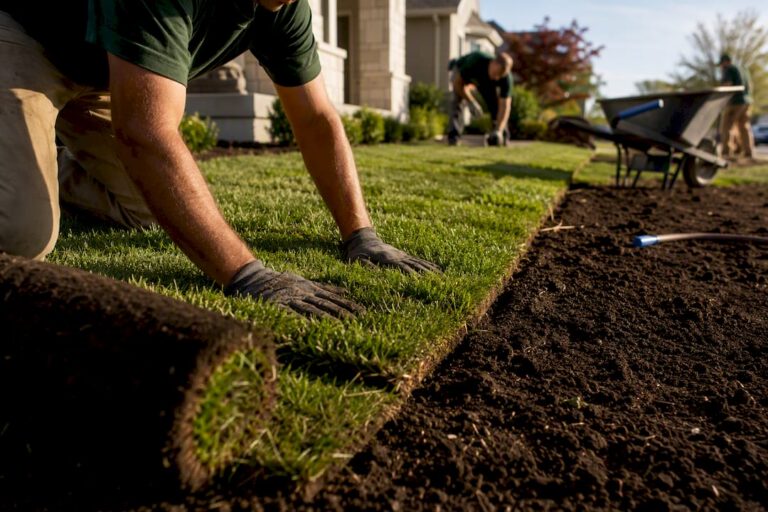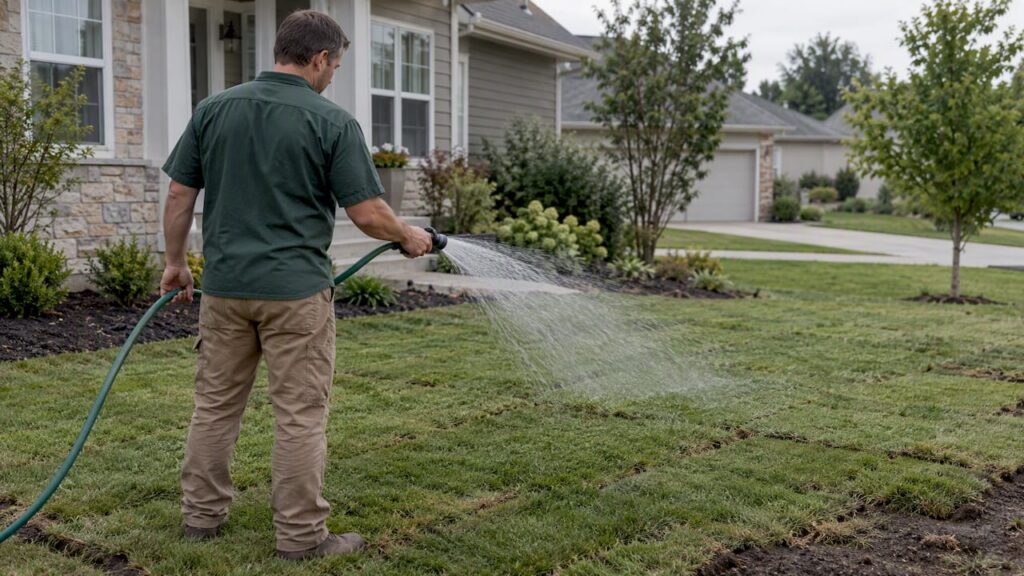
Water new sod immediately after installation until the soil beneath it is wet to a depth of 3 to 4 inches, then follow it with two to four short watering cycles a day for the first week to keep the top inch of soil consistently moist. In weeks two through four, taper down to one deep watering a day, then every other day, letting moisture tests and weather guide the exact timing. After about a month, most lawns are ready for a normal, infrequent watering routine.
TL;DR:
- Proper watering during the first 30 days requires soaking the soil to 3 to 4 inches depth immediately after installation and then following a specific schedule to promote root growth.
- During the first week, daily short watering cycles keep the top inch moist, then gradually transition to every other day as roots establish, based on soil moisture and weather conditions.
- Conducting catch-can tests and using simple tools like a screwdriver and tug test help homeowners accurately assess soil moisture and root anchoring without wasting water.
- Overwatering causes saturated soil and fungal risks, while insufficient watering leads to dry, shrinking roots, making balanced, deep, soak-and-cycle irrigation essential.
- Professional installation and initial watering guidance ensure optimal establishment, reducing the risk of patchy roots or lawn failure caused by DIY errors.
Table of Contents
- Why the first 30 days determine whether your lawn survives
- Your week-by-week sod watering schedule
- How to water sod correctly without wasting water or causing runoff
- Simple tests that tell you if your watering is working
- When it’s safe to mow and fertilize new sod
- Fixing common sod watering problems
- What the research and field experience agree on
- What separates a lawn that takes root from one that doesn’t
- Let Ivan’s Landscaping handle the install and the first 30 days
- Sources
- FAQ
Why the first 30 days determine whether your lawn survives
Sod arrives at your property with most of its root system cut away at the farm. What you are laying down is really a living mat of grass blades and a thin layer of soil, and that mat has to grow new roots down into your yard before it can support itself. That process typically takes 2 to 3 weeks to get started, though Clemson’s HGIC and most extension programs count on a full 30 days before the root zone is strong enough to handle normal wear and reduced watering.
This is why the watering schedule matters more in this window than at any other point in the lawn’s life. Soil that stays consistently moist but not saturated gives new roots the oxygen and water they need to push downward. Soil that dries out between waterings stresses the sod before it has anchored itself, while soil that stays soggy suffocates those same roots and invites fungal problems.
A few things are happening under the surface during this period:
- Severed roots begin regenerating and reaching into the native soil below the sod.
- Oxygen in the soil pores is just as important as moisture for root growth.
- Saturated soil pushes out oxygen and can rot roots before they form.
- Bone-dry soil causes the thin sod layer to shrink, pull away from the ground, and die at the edges.
Getting the balance right in these first few weeks sets up everything that follows, including how often you’ll need to water once the lawn matures.
Your week-by-week sod watering schedule
The schedule for newly laid sod moves through phases including installation day, the initial establishment week, and a gradual taper over several weeks. Each phase has a different goal, and skipping ahead too fast is the most common mistake homeowners make.
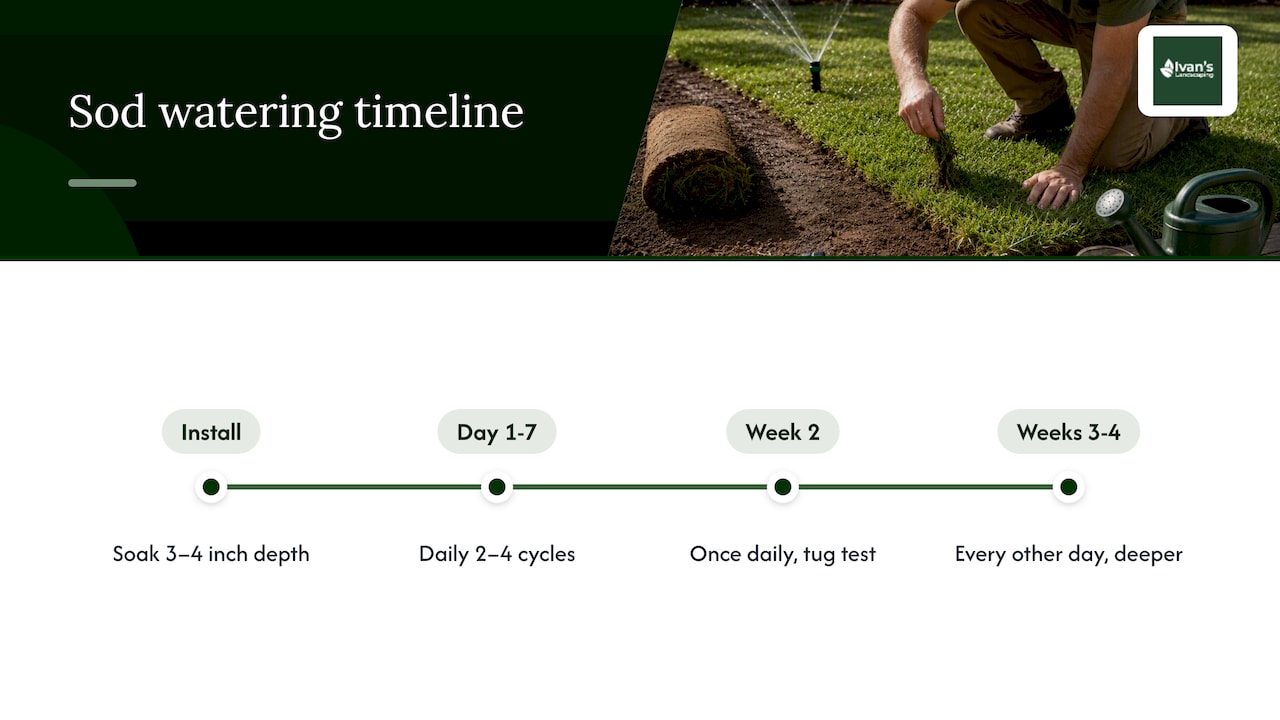
Installation day. Water the sod as soon as it’s down, and don’t wait for a convenient time. The goal is to soak the sod and the soil beneath it to a depth of 3 to 4 inches, which Clemson’s HGIC identifies as the depth needed to create good contact between the new root zone and your existing soil. Check your work with a screwdriver pushed straight down through the sod. If it slides in easily to that depth, you’ve watered enough. If it stops short, keep watering.
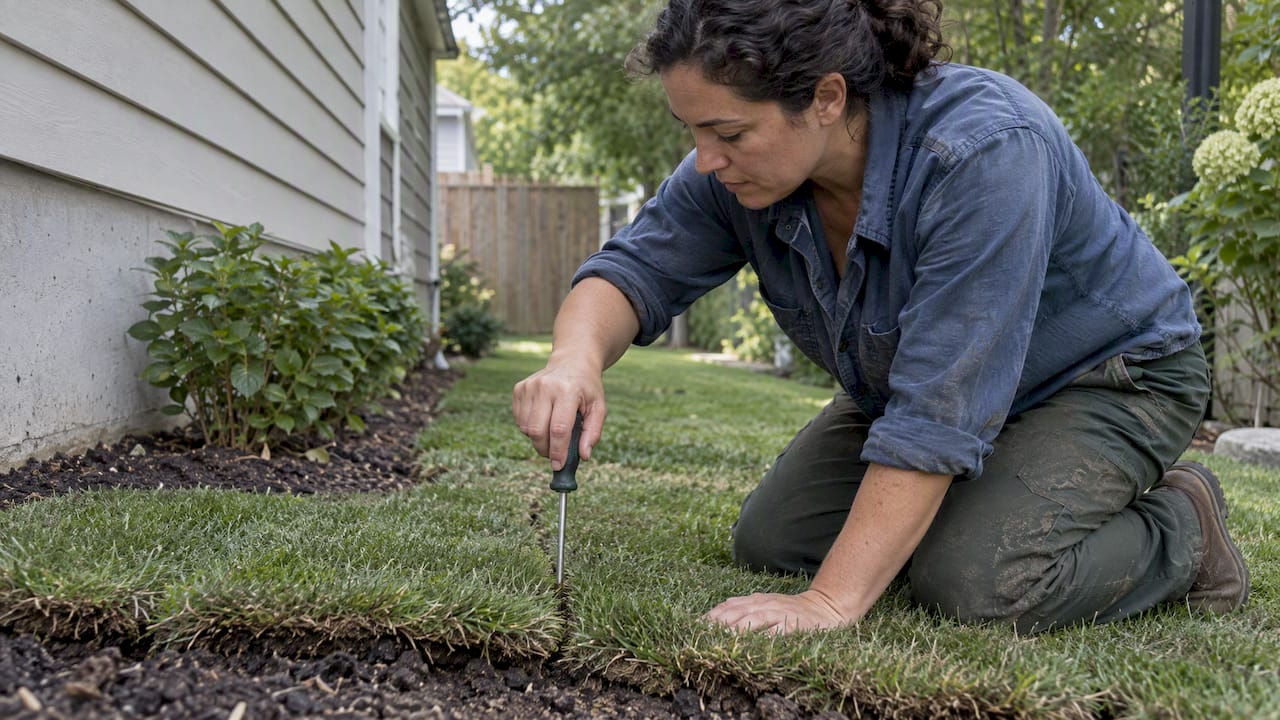
Days 1 through 7. This is the heaviest watering period of the entire establishment process. Mississippi State University Extension recommends daily watering during the first week, and in practice that usually means breaking the day’s water into two to four shorter cycles rather than one long soak. Early morning, midday, and late afternoon sessions of 10 to 20 minutes each (depending on your sprinkler’s output) keep the top inch of soil consistently damp without oversaturating it. Check several spots around the yard daily, not just one, since sun exposure and slope can dry sections unevenly.
Week 2. Once roots start reaching into the soil, usually between day 10 and day 14, you can shift to once-daily watering with a longer run time per session. This is also when the tug test becomes useful: grab a corner of sod and give it a gentle pull. If it resists and feels anchored, roots are forming.
Weeks 3 and 4. Reduce frequency to every other day, then stretch toward a deeper, less frequent routine as roots reach 3 to 4 inches down. Oregon State University Extension notes that frequent light watering should always give way to deeper, less frequent irrigation as the root system develops, because sod that stays on shallow, frequent watering forever ends up with a shallow, drought-sensitive root system instead of a resilient one.
One statistic worth keeping in mind: Mississippi State University Extension states that daily watering in week one should reduce to every-other-day watering as soon as roots begin forming, rather than following a fixed calendar regardless of conditions. The schedule is a guide, not a substitute for checking the soil yourself.
Soil type changes how long each cycle should run. Sandy soil drains fast and may need shorter, more frequent cycles. Clay soil absorbs slowly and benefits from shorter bursts with rest periods in between, a technique covered in the next section. Loam sits in the middle and is the most forgiving to work with. Grass species matters too: warm-season sod like Bermuda or zoysia tends to root faster in warm weather, while cool-season sod like Kentucky bluegrass or tall fescue often takes a bit longer and benefits from watering during the coolest part of the day to limit evaporation and disease pressure.
How to water sod correctly without wasting water or causing runoff
Knowing the schedule is only half the job. How you deliver that water determines whether it actually reaches the root zone or runs off into the street.
- Run a catch-can audit first. Place a few identical, straight-sided cans (empty tuna or coffee cans work fine) around each sprinkler zone, run the system for 15 to 30 minutes, then measure the water depth in each can. UMN Extension recommends this method specifically because it removes the guesswork of setting run times and reveals zones that are watering unevenly, which is a common cause of patchy rooting.
- Calculate your zone’s precipitation rate. Divide the depth of water collected by the number of minutes the system ran, then multiply by 60 to get inches per hour. That number tells you exactly how many minutes it takes to apply the depth your sod needs at that stage.
- Use soak-and-cycle instead of one long run. Run the zone until you see water starting to pool or sheet off, stop and let it soak in for 20 to 30 minutes, then repeat until you’ve reached your target depth. Kansas State Research & Extension lists example infiltration rates to work from: loam soil absorbs roughly 1 inch per hour, silty clay loam closer to half an inch per hour, and compacted clay as little as 0.2 inches per hour. Applying water faster than that just sends it downhill.
- Adjust for slope and sprinkler type. Pop-up spray heads apply water faster than rotary heads, so slopes and clay soils under spray heads need shorter, more frequent cycles to avoid runoff.
Pro Tip: Run your catch-can test once per season, not just at install. Sprinkler heads drift out of adjustment, and a five-minute check saves weeks of guessing.
Simple tests that tell you if your watering is working
You don’t need equipment beyond a screwdriver and your own hands to know whether your schedule is on track.
- Screwdriver test: push a standard screwdriver straight down through the sod. It should slide in easily to about 3 to 4 inches in properly moist soil and feel cool and damp when you pull it out, a method Mississippi State University Extension recommends as a reliable, low-tech check.
- Tug test: lift a corner of sod gently around day 10 to 14. UMN Extension notes that resistance to lifting at that point is a sign the root-to-soil union is forming.
- Visual cues: footprints that stay compressed instead of springing back, a dull or blue-gray cast to the blades, and visible wilting all point to insufficient water. Standing water or a spongy feel underfoot points to too much.
If the screwdriver meets resistance before 3 inches, water more. If the ground feels soggy a full day after watering, back off and extend the interval between cycles.
When it’s safe to mow and fertilize new sod
Watering isn’t the only thing on a timer during establishment. Mowing and fertilizing too early can undo weeks of careful watering.
- Wait to mow until the sod has rooted enough that it doesn’t shift underfoot, usually once it reaches your mower’s recommended cutting height, and follow the one-third rule so you never remove more than a third of the blade length in a single cut.
- Hold off on fertilizer for roughly 30 to 60 days, adjusting based on a soil test and the product label, and avoid heavy nitrogen applications in the first week while roots are still forming.
- Pause watering for a day or two before that first mow so the ground firms up enough to support the mower’s weight without rutting.
- Resume your normal moisture checks the day after mowing or fertilizing, since both activities can temporarily dry out the surface.
Fixing common sod watering problems
Most establishment failures trace back to one of a few fixable mistakes.
- Overwatering: soggy soil, a sour smell, or fungal spots mean you’re applying more than the soil can absorb. Cut back frequency and check drainage.
- Runoff: water running off the lawn instead of soaking in usually means your cycles are too long for the soil’s infiltration rate. Shorten each cycle and add more soak periods between them.
- Patchy rooting: re-run your catch-can test to find weak or uneven zones, adjust the sprinkler heads, and hand-water any dry patches directly.
- Persistent wet spots or widespread failure: these can point to drainage or grading problems underneath the lawn, which is worth a professional assessment rather than more guesswork with the hose.
What the research and field experience agree on
The schedule above isn’t a guess. Clemson’s HGIC, Kansas State Research & Extension, UMN Extension, and Oregon State University Extension all converge on the same core practices: soak to 3 to 4 inches at installation, water frequently and lightly at first, then transition to deeper and less frequent irrigation as roots form.
In the field, Ivan’s Landscaping checks soil moisture at the time of installation and walks clients through the first watering cycle so the schedule starts correctly from day one, since a mistake in the first 24 hours is harder to correct than one made in week three.
What separates a lawn that takes root from one that doesn’t
The homeowners who get this right aren’t the ones with the fanciest sprinkler systems. They’re the ones who presoak the ground before the sod even arrives, walk the yard daily during hot stretches to check moisture by hand, and catch a dry corner before it becomes a dead patch.
Measuring your system’s actual output with a catch-can test, instead of guessing at run times, is the single habit that separates a lawn that roots evenly from one that ends up patchy. Give the first 30 days your attention and the lawn will reward you with years of easier upkeep.
— Chas
Let Ivan’s Landscaping handle the install and the first 30 days
Watching soil moisture several times a day for a month isn’t realistic for every homeowner, especially with work, travel, or a busy household competing for attention. Professional landscaping companies install sod and set up the post-install watering routine to ensure the critical establishment window is handled correctly from the first day instead of left to trial and error.
Our sod installation service includes proper soil preparation, the initial deep soak, and guidance on the watering schedule your specific lawn needs based on soil type and grass species. We back our work with a satisfaction guarantee, respond quickly with free estimates, and leave every job site clean when we’re finished. For the maintenance that follows once your lawn is established, our lawn care plans keep it looking consistent through the rest of the season.
Request a free estimate today and let us get your new lawn rooted right the first time.
Sources
The schedule and tests in this article draw on Clemson’s HGIC for watering depth, Kansas State Research & Extension for soak-and-cycle infiltration rates, UMN Extension for the catch-can audit method, and Oregon State University Extension for the frequent-to-deep watering transition. For readers calibrating irrigation systems to reduce waste during this high-water-use period, this guide on reducing property water waste covers practical efficiency steps.
- Lawn establishment | HGIC (Clemson Extension)
- Watering your lawn (MF2059) | Kansas State Research & Extension
- Auditing home lawn irrigation systems | UMN Extension
- Sod installation and maintenance | Mississippi State University Extension
- Practical lawn establishment and renovation (EC 1550) | Oregon State University Extension
FAQ
How long should new sod be watered each day?
During the first week, new sod typically needs two to four short watering sessions a day totaling enough time to keep the top inch of soil consistently moist, based on your sprinkler’s measured output. Mississippi State University Extension recommends daily watering in week one, tapering to every other day as roots begin forming around day 10 to 14.
Is 30 minutes of watering grass enough?
It depends entirely on your sprinkler’s precipitation rate and your soil type, not on a fixed number of minutes. A catch-can test, recommended by UMN Extension, tells you exactly how much water 30 minutes actually delivers in your yard so you can adjust run time to match the depth your sod needs.
Can you overwater freshly laid sod?
Yes, and it’s one of the most common establishment mistakes. Soil that stays saturated pushes oxygen out of the root zone, which can rot new roots before they form and invite fungal problems, so the goal is consistently moist soil rather than standing water.
Can I just lay sod over dirt?
Sod needs bare, prepared soil underneath it, not dirt covered in old grass, debris, or heavy compaction, since good soil contact is what allows new roots to grow downward. Clemson’s HGIC emphasizes watering immediately after installation specifically to create that contact between the sod and the soil below it.