A boulder retaining wall is a gravity-based structure built from stacked, interlocking natural stones instead of poured concrete or manufactured blocks, and it’s a strong fit for homeowners who want a natural look that holds up for decades. The catch: it lives or dies on two things you can’t skip, a compacted base and real drainage behind the stone. Walls under about 4 feet are often manageable as a homeowner project; anything taller needs engineering. Expect somewhere in the range of $25 to $50 per square foot installed. More if access is tight or the wall climbs higher.
TL;DR:
- Proper drainage with perforated piping and gravel backfill is essential to prevent hydrostatic pressure and ensure the wall’s longevity.
- Base course boulders should be the largest, buried around a third into the ground, and placed on a compacted crushed rock trench for stability.
- Terraced walls under 4 feet are usually manageable for homeowners, but taller walls and those near structures require engineering and permits.
- Using flat-faced boulders with a staggered joint pattern and good base compaction significantly reduces failure risks over time.
- Costs typically range from $25 to $50 per square foot, with higher expenses for larger boulders, difficult access, or engineering requirements.
Table of Contents
- What Is a Boulder Retaining Wall, and When Does It Make Sense?
- Choosing a Style: Naturalistic, Dry-Stack, Mortared, or Terraced
- Picking the Right Rock and Sizing the Base Correctly
- How to Build a Boulder Retaining Wall Step by Step
- What Does a Boulder Retaining Wall Cost, and What Permits Apply?
- Common Mistakes That Cause Boulder Walls to Fail
- When to Call a Contractor Instead of DIY
- Get a Free Estimate for Your Boulder Retaining Wall
- Boulder Wall Perspective: What the Manuals Don’t Tell You
- Sources
- FAQ
What Is a Boulder Retaining Wall, and When Does It Make Sense?
A boulder retaining wall holds back soil purely through the weight and friction of stacked stones, what engineers call a gravity structure. There’s no rebar, no poured footing, no mortar in most residential builds. Instead, large rocks are set dry, interlocking course by course, with each layer leaning slightly into the hillside. The FHWA’s rockery design guidelines treat these walls the same way engineers treat any gravity wall, checking them against sliding, overturning, and bearing capacity once they get tall.
That makes boulder walls a natural choice for some situations and a poor one for others.
- Sloped yards where you want a terraced planting area instead of a steep bank
- Erosion control along a creek edge or drainage swale
- A natural-stone look that blends with existing landscaping rather than looking engineered
- Moderate height changes, generally under 4 feet, where drainage and base work are manageable
Skip boulders if you’re retaining a very tall cut, if equipment can’t reach the site, or if the wall sits near a driveway, sidewalk, or road where a shifted stone becomes a hazard.
Choosing a Style: Naturalistic, Dry-Stack, Mortared, or Terraced
Most homeowners land on one of four approaches, and the right one depends on the slope, the look you want, and how much you’re willing to spend on labor.
- Naturalistic rockery: Irregular boulders set to look like an outcropping, with varied sizes and generous gaps filled by soil and plants. This style hides construction seams well and ages gracefully.
- Dry-stack (interlocking): Precisely fitted stones with tight joints and no mortar. It relies entirely on interlock and gravity, which is why boulder selection and stacking skill matter so much here.
- Mortared or faced walls: Mortar between joints for a cleaner, more formal look, sometimes used when boulders face a highly visible area like a front entry. This adds cost and reduces the wall’s ability to drain naturally through the joints.
- Terraced walls: Instead of one 6 foot wall, you build two or three shorter walls stepped back from each other.
Terracing usually beats a single tall wall for both looks and cost. Shorter walls rarely trigger engineering requirements, and the stepped design gives you extra planting beds between tiers, something a single monolithic wall can’t offer.
Picking the Right Rock and Sizing the Base Correctly
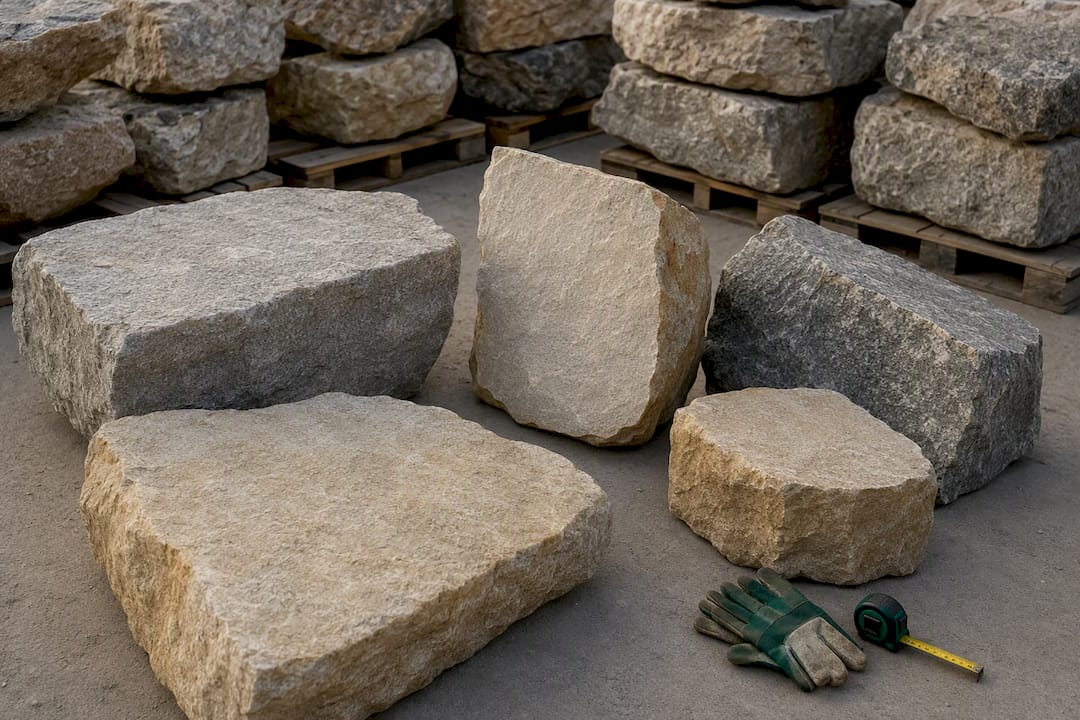
Granite, limestone, and fieldstone are the workhorses of boulder wall construction, and each does something a little different. Granite and other angular fieldstone give you sharper faces that lock together tightly, which matters more for dry-stack walls than for naturalistic ones. Limestone tends to be softer and easier to source regionally in the Midwest, often at a lower delivered cost.
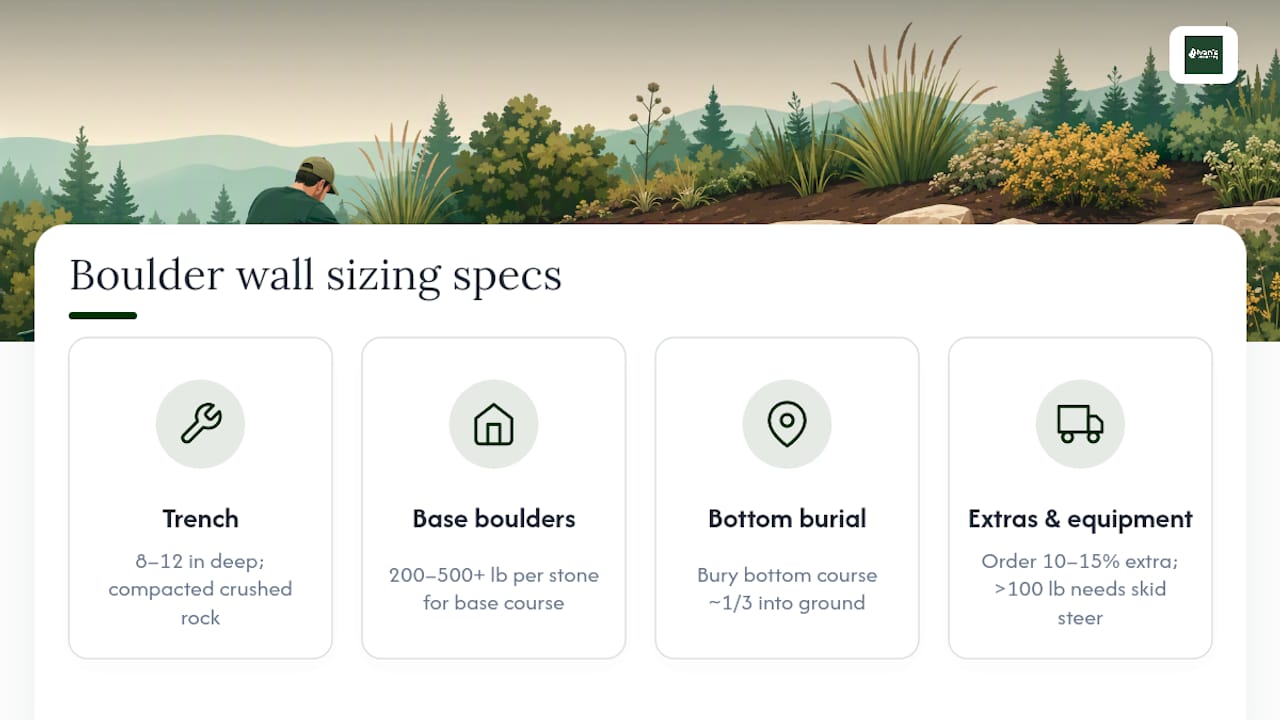
Sizing runs from the ground up. Base course boulders should be your largest, often 200 to 500 pounds or more depending on wall height, since they carry the load of everything above them. Upper courses can step down in size as you go. According to DG Floors’ homeowner guide, a good rule of thumb is burying the bottom course roughly one-third into the ground for stability, and ordering 10 to 15% more stone than your calculated volume to account for irregular shapes and breakage.
Pro Tip: Ask your quarry or supplier for boulders with at least one flat face. A single flat surface on each stone makes stacking dramatically faster and produces a tighter, more stable wall.
The base trench itself typically runs 8 to 12 inches deep, filled with compacted crushed rock, not loose gravel, before the first boulder ever touches the ground. Delivery logistics matter too: anything over 100 pounds per stone generally means a skid steer or mini excavator on site, which affects both scheduling and cost.
How to Build a Boulder Retaining Wall Step by Step
Building a boulder wall follows a fairly consistent sequence, whether a homeowner tackles a 2-foot garden wall or a contractor handles a taller terrace.
- Lay out and check utilities. Mark the wall line, call for utility locates, and assess the slope above the wall, the “zone of influence” that will bear down on your structure.
- Excavate and compact the base. Dig the trench to depth, then compact 6 to 8 inches of crushed rock, checked with a hand tamper or plate compactor.
- Set the base course with batter. Place your largest boulders first, tilting each course back slightly into the hill, roughly 1 inch of setback for every foot of height.
- Install drainage. Lay perforated pipe with holes facing down along the base, then backfill with 12 inches of clean, angular gravel against the cut slope, wrapped in geotextile fabric to keep soil from clogging it. This single detail, drainage behind the wall, prevents the majority of boulder wall failures.
- Stack remaining courses. Stagger vertical joints between courses, maintain batter, and wedge smaller “chinking” stones into gaps for extra stability.
- Backfill and compact. Fill behind the gravel zone in lifts, compacting as you go, and make sure the drain pipe daylights somewhere it can actually discharge.
- Finish grading and plant. Slope the soil above the wall away from the structure and add plantings once the backfill has settled.
Call a structural engineer once your exposed wall height approaches 4 feet, when soil conditions are poor or saturated, or when the wall retains a structure like a patio, driveway, or foundation. That threshold isn’t arbitrary. It’s the point where most local jurisdictions require a permit and engineered design.
What Does a Boulder Retaining Wall Cost, and What Permits Apply?
Expect $25 to $50 per square foot installed for a typical boulder retaining wall, according to HomeGuide’s cost data, with the broader natural stone category ranging from $10 to $85 or more per square foot depending on boulder size and site access. Per-ton boulder pricing generally runs $100 to $600 depending on rock size and how far it has to travel.
Several factors push costs up or down:
- Wall height and length: taller walls need more material and often heavier equipment.
- Site access: a backyard reachable only by wheelbarrow costs more in labor than one a skid steer can drive into.
- Engineering and permits: most jurisdictions require an engineered design and permit past roughly 4 feet of exposed height, and geogrid reinforcement for taller walls adds $3.53 to $6 per square foot.
- Local rock sourcing: ordering stone quarried nearby cuts freight costs significantly compared to trucking boulders long distances.
A modest 30-foot-long, 3 foot tall wall often lands in the low thousands installed, and mini excavator rental alone runs $250 to $450 a day if you’re handling it yourself. Scheduling in a shoulder season, rather than peak spring or fall, can also shave labor costs.
Common Mistakes That Cause Boulder Walls to Fail
Most boulder wall failures trace back to the same handful of construction shortcuts, and they’re worth knowing before you break ground.
- Skipping drainage: trapped water builds hydrostatic pressure behind the wall, which is the single leading cause of failure.
- Undersized or compacted base: a soft base settles unevenly, and the whole wall shifts with it.
- Aligned vertical joints: stacking boulders directly on top of each other, rather than staggering the seams, creates weak points that crack open over time.
- No batter: a perfectly vertical face has far less resistance to soil pressure than one leaning back into the hill.
Watch for early warning signs, a slight bulge in the wall face, a stone that’s rotated out of alignment, or soil washing out between joints after rain. Individual boulder movement, sometimes called elemental failure, is a distinct risk with rock walls and tends to show up at the face first, before the whole section gives way.
Pro Tip: Walk your wall every spring after frost heave season. Re-tamp any low spots in the backfill and clear drain outlets before they clog with leaves or sediment.
When to Call a Contractor Instead of DIY
Professional landscapers have been building hardscape and drainage projects in the McHenry County area since 2008, and the same rule applies to every retaining wall project: height, soil, and access decide whether it’s a weekend project or a job for professionals. Once a wall crosses 3 to 4 feet, involves poor or saturated soil, or sits near a patio, driveway, or foundation, bring in a contractor who can pull permits and, if needed, coordinate an engineer.
A solid quote should spell out the base and drainage plan, note whether engineering is required, list equipment and timeline, and confirm site cleanup. Some landscaping companies offer satisfaction guarantees, fast free estimates, and ensure job sites are left clean when the work is completed.
Get a Free Estimate for Your Boulder Retaining Wall
Building a boulder retaining wall that actually lasts comes down to details most homeowners never see until something goes wrong: a compacted base you can’t inspect once it’s buried, a drainage zone hidden behind the stone, and batter angles that look subtle but carry real structural weight. That’s the gap Ivanslandscaping closes. Hiring a professional crew experienced in hardscape and drainage work, with permitting and grading knowledge, can help ensure the project is done correctly the first time.
Our pavers and patios team handles retaining wall projects alongside patios, walkways, and other hardscape work, so if your terrace plan involves more than one feature, we can scope it together. A first visit covers a full site assessment, a drainage plan specific to your slope, and a clear, itemized quote, backed by our satisfaction guarantee. If you’re outside our direct service map, our McHenry County area page lists where we work. Request your free estimate today and find out what a properly built boulder wall costs for your yard.
Boulder Wall Perspective: What the Manuals Don’t Tell You
Most online guides treat boulder retaining walls like an oversized game of stacking blocks, get the base level, pick big rocks, done. That undersells what’s actually happening structurally. A boulder wall is closer to a dry-laid gravity dam than a garden feature, and the engineering literature on rockery failure modes makes a point that rarely shows up in homeowner content: individual boulders can fail even when the wall as a whole doesn’t, a slow, rotational shift of one stone that eventually drags its neighbors with it.
That’s why I’d push back on the common advice to judge a boulder wall by its finished look. A beautifully naturalistic face with tight joints and good plant fill can still be sitting on a base that was never compacted properly, and you won’t know until the third spring thaw. The homeowners who get the best results aren’t the ones who pick the prettiest rock. They’re the ones who ask their contractor pointed questions about the drainage zone and the base depth before a single boulder gets placed, because those two invisible decisions determine whether the wall is a 10 year feature or an 80 year one.
— Chas
Sources
- Rockery design and construction guidelines — FHWA (Forest Highway/USFS study)
- How much does a stone retaining wall cost? (HomeGuide)
- Retaining wall cost calculator (ProjectCostPro)
- Drainage and erosion control behind boulder retaining walls — Boulder Mountain Rock Walls
- Boulder retaining wall: homeowner’s guide — DG Floors
FAQ
How Much Does a Boulder Retaining Wall Cost?
Most boulder retaining walls cost $25 to $50 per square foot installed, though costs can climb toward $85 or more per square foot for larger boulders or difficult site access. Ivanslandscaping provides current pricing through a free, on-site estimate rather than a flat rate, since wall height and access change the scope significantly.
Does a Boulder Wall Need Drainage?
Yes, and it’s not optional. Trapped water behind the wall creates hydrostatic pressure, the leading cause of boulder wall failure, so every build needs a perforated pipe, a gravel drainage zone, and geotextile fabric behind the stone.
How Do You Properly Build a Boulder Retaining Wall?
A proper build starts with a compacted crushed-rock base, sets the largest boulders first with a slight backward batter, and installs drainage before backfilling. Stones are staggered course to course rather than stacked in straight vertical lines, which keeps the wall from developing weak seams.
How Long Do Boulder Retaining Walls Last?
A boulder wall built on a proper base with working drainage can last decades, and many well-built walls hold up for a century, according to DG Floors’ construction guidance. Walls that skip drainage or base compaction tend to show bulging or shifting within just a few years.