A properly built wood retaining wall is an economical, DIY-friendly option for low walls generally under 3 to 4 feet but only when you use ground-contact-rated pressure-treated timbers, real drainage, and rebar anchors. Skip any of those, and you’re looking at a wall that leans, rots, or fails within a few seasons. If your project approaches that 3 to 4 foot mark, sits under a load like a patio or driveway, or faces poor soil, plan on an engineer and a permit rather than a weekend project.
TL;DR:
- Proper drainage and rebar pinning are critical to prevent wood rot and failure, especially for walls approaching 3 to 4 feet in height.
- Using UC4A or UC4B rated pressure-treated timber ensures long-term durability, with UC4B offering greater resistance in wetter or heavier load conditions.
- Drainage systems with perforated pipes and gravel fill are essential to reduce hydrostatic pressure and avoid leaning or collapsing over time.
- Permits and engineering reviews become necessary once the wall exceeds approximately 3 feet or if site conditions involve surcharge loads or unstable soils.
- Costs for DIY timber walls range from $800 to $3,600, but taller or more complex projects near load-bearing structures or property lines are better managed by professionals.
Table of Contents
- What Materials and Tools Does a Wood Retaining Wall Need?
- How Do You Build a Timber Retaining Wall Step by Step?
- Why Does Drainage Matter More Than the Wood Itself?
- How Tall Can a Wood Retaining Wall Be Without a Permit?
- What Does a Wood Retaining Wall Cost and How Long Does It Last?
- When Should You Hire a Landscaping Pro Instead of DIY?
- A Contractor’s Honest Take on DIY Timber Walls
- Get a Wood Retaining Wall Built Right the First Time
- Sources
- FAQ
What Materials and Tools Does a Wood Retaining Wall Need?
Start with the lumber, because getting this wrong undoes everything else. Municipal engineering details, including Fairfax County’s typical retaining wall specifications, call for southern pine rated UC4A for ground contact at minimum. If your wall will sit buried in wet soil for decades, UC4B contractor-grade timber costs a little more but resists rot noticeably longer, and it’s worth ordering from the yard counter rather than grabbing whatever’s stacked near the entrance. Cedar and redwood resist decay naturally and look better exposed, but they run considerably more expensive than treated pine for the same structural job.
Your shopping list should include:
- 6×6 timbers, UC4A minimum, UC4B for heavier loads or wetter sites
- hot-dip galvanized or stainless steel spikes for fastening courses together
- Rebar pins, typically 24 inches long, driven through pre-drilled holes to lock courses in place
- 4-inch perforated drain pipe, clean crushed stone, and non-woven filter fabric for drainage
- Timber screws as a backup or supplement to spikes on shorter runs
For tools, you’ll want a plate compactor (rent, don’t buy, unless you’re building walls professionally), a sledgehammer, a circular saw rated for treated lumber, a drill with long bits sized for your rebar, a level, and a hand tamper for tight spots the compactor can’t reach.
How Do You Build a Timber Retaining Wall Step by Step?
Layout comes before anything touches dirt. Call 811 or your local utility locator before you dig, then mark your wall line and batter (the slight backward lean toward the hillside) with stakes and string.
- Excavate the trench for your base, typically 6 to 8 inches deep, deeper in frost-prone regions where the footing needs to sit below the frost line.
- Compact crushed stone into that trench with a plate compactor until it’s dense and level. This footing is what keeps your entire wall from settling unevenly.
- Set the first course directly into the trench, checking level constantly, and bury it partially so the wall has a stable base to push against.
- Pin the first course by drilling through the timber and into the base with rebar. This is the step most DIY walls skip, and it’s the reason they shift.
- Stack subsequent courses, staggering the joints the way you’d stagger brick, so no vertical seam runs unbroken through the wall.
- Pin every course with rebar spaced roughly every 3 to 4 feet, and fasten each timber to the one below it with 60d spikes.
- Install deadmen (also called tiebacks) once your wall height or backfill load calls for extra reinforcement, generally spaced about 8 feet on center, excluding the top and bottom courses.
- Backfill in lifts, compacting each 6 to 8 inch layer before adding the next, with drainage stone against the timbers and topsoil graded away from the wall face at the surface.
Pro Tip: Seal every cut end of your timbers with a compatible sealant before you set them. Pressure treatment only penetrates an inch or two into the wood, so any cut, drilled, or notched surface is exposed, untreated wood waiting to rot from the inside out.
Why Does Drainage Matter More Than the Wood Itself?
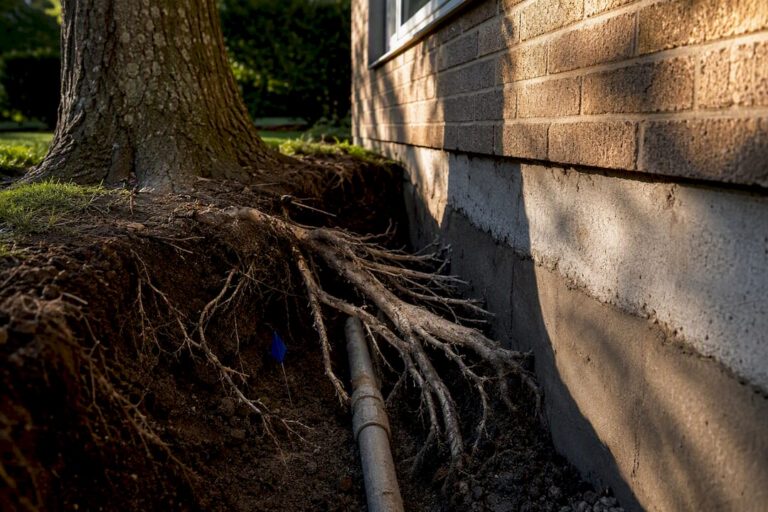
Water trapped behind a retaining wall creates hydrostatic pressure, and that pressure, not the timber grade, causes most wall failures. A wall that looks perfectly built on installation day can bow or collapse within two years if water has nowhere to go.
The fix is straightforward:
- Run 4-inch perforated pipe along the base of the wall, sloped to daylight or a dry well so water actually exits the system instead of pooling.
- Surround that pipe with clean crushed gravel, then wrap the whole assembly in non-woven filter fabric to keep soil fines from clogging the stone over time.
- Keep gravel backfill running close to the timbers for the full height of the wall on taller builds, and compact each lift as you go rather than dumping it all at once and hoping it settles evenly.
Skimping on gravel width to save a delivery fee is one of the more common corners cut on DIY jobs, and it’s the corner that shows up first when the wall starts leaning.
How Tall Can a Wood Retaining Wall Be Without a Permit?

Most how-to guidance recommends roughly 3 feet as the maximum height for an unengineered DIY timber wall. Once you’re in the 3 to 4 foot range, you’re commonly crossing into territory where engineering review and a permit apply, and many towns set that permit trigger right around 30 inches, so check your local building department before you dig.
Several site conditions push that threshold lower even if your wall looks short on paper:
- A surcharge load nearby, like a patio, driveway, shed, or pool, adds pressure an unengineered wall wasn’t designed to hold.
- Poor or expansive soils behind the wall increase lateral force well beyond what the same wall height would face in stable ground.
- A high water table or heavy clay slows drainage and increases hydrostatic pressure regardless of how well you install your pipe.
- Frost heave in colder climates can shift footings that aren’t set deep enough, a factor that catches out-of-state DIY guides off guard when readers apply them locally.
If you’re near any of these limits, an engineer will typically provide structural calculations, a tieback or deadman design, and a specified footing depth, and most inspectors will want to see drainage details and rebar placement before signing off.
What Does a Wood Retaining Wall Cost and How Long Does It Last?
Wood is generally the least expensive retaining wall material for short runs. Cost estimates for basic DIY timber walls typically fall somewhere between $800 and $3,600, with per-square-foot pricing landing around $20 to $30, roughly half what block or stone walls run for the same footprint.
That savings comes with a tradeoff: shorter lifespan and more upkeep. A well-built timber wall with proper drainage often lasts well over a decade, though lifespan varies with conditions and maintenance, while comparable stone or block walls can outlast that by decades. Your annual maintenance checklist should include:
- Inspecting drainage outlets to confirm water is actually exiting and not backing up behind the wall.
- Checking for bowing, leaning, or gaps between courses that signal movement.
- Looking closely at cut ends and ground-contact points for early rot, and resealing exposed cuts as needed.
When Should You Hire a Landscaping Pro Instead of DIY?
Some walls are worth handing off, particularly ones near a foundation, a property line, or a slope with a history of erosion. Professional landscapers have built and maintained landscape features across McHenry County, IL since 2008, including retaining wall construction alongside paver patios, drainage work, and seasonal maintenance.
Hiring a contractor makes the most sense when:
- Your wall height or site conditions push past the safe DIY threshold and you need engineering sign-off.
- You want someone else managing the permit and inspection process instead of chasing it yourself.
- The wall sits close to a structure, driveway, or slope where a mistake is expensive to fix later.
- You’d rather have a satisfaction guarantee and a fast estimate turnaround than gamble a weekend on a first attempt.
A Contractor’s Honest Take on DIY Timber Walls
The failures I see repeat a pattern: no drainage plan, a shallow or uncompacted base, and timbers stacked without pinning. Fix those three things and most DIY walls hold up fine. Check utilities, plan your drainage first, buy UC4A lumber, pin your first course, and compact backfill in lifts. Skip a step, and gravity finds it.
— Chas
Get a Wood Retaining Wall Built Right the First Time
A DIY timber wall can absolutely work for a low, straightforward slope. But once surcharge loads, tricky soils, or a height near that 3 to 4 foot line enter the picture, the cost of getting it wrong (regrading, re-excavating, replacing rotted timbers) usually exceeds what a professional install would have run in the first place. Landscaping contractors handle retaining wall construction for residential and commercial properties across McHenry County, assessing your site conditions, coordinating engineering review when a wall calls for it, and managing the permit process. Some contractors offer a satisfaction guarantee on installations. If you’re weighing a DIY build against hiring it out, request a free estimate through Ivanslandscaping’s services page and get a straight answer on what your specific slope needs, or browse recent retaining wall projects to see finished results before you decide.
Sources
For local permit and construction detail requirements, check your municipality’s own detail sheets alongside comprehensive how-to references. Useful starting points include the Fairfax County retaining wall details, the City of Alexandria’s detail package, and a practical build walkthrough like InsideGrown’s landscape timber guide. If your project involves clearing existing structures or heavy debris, Barnes Demolition handles site clearance and waste removal for larger jobs.
FAQ
Is Wood Good for a Retaining Wall?
Yes, for low walls under about 3 to 4 feet, ground-contact pressure-treated wood rated UC4A or UC4B performs well when paired with proper drainage and rebar anchoring; it’s less suited to tall walls or heavy surcharge loads without engineering.
What Is the Cheapest Retaining Wall You Can Build?
A DIY timber wall is typically the least expensive option, with basic builds running roughly $800 to $3,600 depending on wall length and height.
Is a Wood Retaining Wall Cheaper Than Stone?
Yes, timber generally costs about half of what block or stone walls run per square foot, though stone and block typically outlast wood by a wide margin.
Can I Use Pressure-Treated 6×6 Wood for a Retaining Wall?
Yes, 6×6 pressure-treated timber rated for ground contact (UC4A or UC4B) is the standard choice for DIY retaining walls, provided courses are pinned with rebar and fastened with 60d galvanized or stainless spikes.