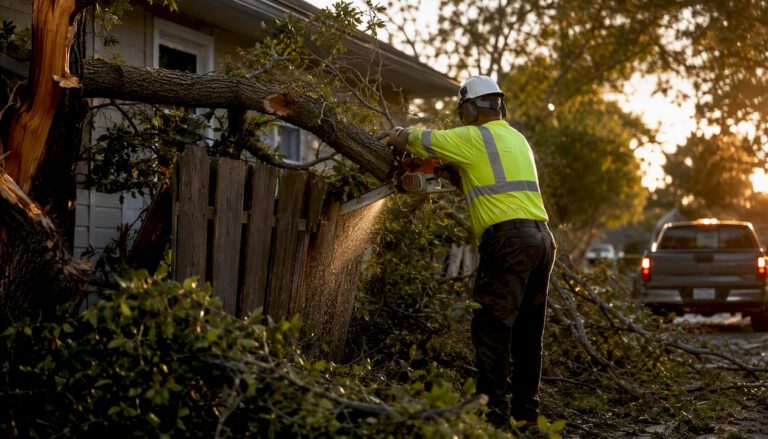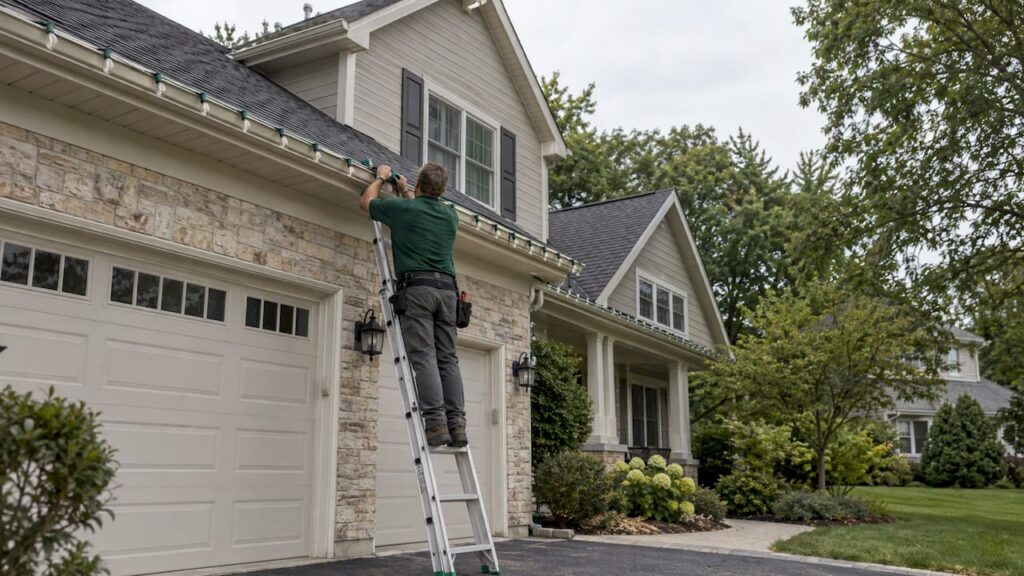
Request estimates in early fall, September through October, and expect installations to run from October into early December. Most professional installs happen before you pick the activation date, because installing and turning on are two separate steps. At Ivan’s Landscaping, we plan the calendar around seasonal installation needs.
TL;DR:
- Request estimates in September or October; November is the peak, and waiting until December means fewer dates and more work in cold, short daylight.
- Choose a dry weekday before Thanksgiving when possible, reserve an alternate date, and confirm how the installer handles wind, snow, ice, and wet roofs.
- Get the installation, activation, and removal windows in writing, along with who supplies lights, covers repairs, provides GFCI protection, and handles cleanup.
- Choose outdoor lights listed by UL or ETL, discard damaged sets, and call the installer rather than climbing onto an icy roof to fix loose clips.
Table of Contents
- What does a month-by-month Christmas light timeline look like?
- What does a professional install day look like?
- Which factors make booking and installation take longer?
- What time of day and weather work best for installation?
- What safety and materials checks come before installation?
- How do you book and what should you confirm?
- How do you maintain the display and fix problems after installation?
- What should you prepare before installation day?
- Which energy-efficient lighting options are worth considering?
- How should you dispose of or recycle old lights?
- Why do we recommend early planning and documented scopes?
- Ready to schedule your holiday lights?
- FAQ
- Sources
What does a month-by-month Christmas light timeline look like?
Think of the season as five stages. Each one has a job for you, and skipping the early ones is what causes last-minute rushes.
- September: Request quotes, take inventory of lights you already own, and schedule consultations.
- October: Finalize the design and lock in an early install date. Installers begin physical work this month.
- November: This is the peak installation window. Aim for a dry weekday before Thanksgiving, when crews are busiest and weather is still workable.
- Early December: Last-available install slots and replacement visits. Waiting this long means fewer date choices and more rooftop work in cold, short daylight.
- January: Removal and storage. Confirm the removal window in your contract so nothing hangs past its welcome.
The consultation is the real decision milestone. You should leave it knowing the design, the cost and the timing, instead of picking a crew only because it advertised an open install date.
What does a professional install day look like?
A typical visit follows the same order, whether the house is small or large:
- The crew arrives and walks the property with you or your property contact.
- They confirm the plan against the written scope.
- They mount clips, lights and any garland along rooflines, trees and railings.
- They run wiring to the approved power source, keeping connections dry and off the ground.
- They test every strand and replace anything that fails.
- They walk you through the finished display and confirm the activation date.
Duration depends on scope, not on a fixed number. A simple single-story roofline needs a shorter crew window. A multi-level house with several rooflines, mature trees or programmable elements needs a longer one, and sometimes more than one day.
On the day, clear access to the walls and trees, leave room to park a truck, keep pets indoors and make sure the outdoor outlets have power.
Pro Tip: Cleared gutters and untangled, tested cords of your own save crew time, and that is often the difference between finishing in one visit and needing a second.
Which factors make booking and installation take longer?
Your lead time and the length of the install both grow with a few concrete variables:
- Property complexity: More rooflines, extra stories and tall trees mean more time on ladders and often a longer wait for a crew slot.
- Scope size: The number of strands, programmable displays, garland and wreaths determines crew size and how many hours the job takes.
- Power and access: Shared circuits and long extension runs can force a redesign or electrical prep before anything is hung.
- Regional weather windows: In northern Illinois, an early frost or snow can push installs earlier or force reschedules, so build in margin.
- HOA or neighborhood rules: Some communities set limits on when lights may go up, be switched on or come down. Check those rules before you pick dates.
Build in extra cushion for each factor that applies to your property. If three apply, book in September, not November.
What time of day and weather work best for installation?
Mid-morning to early afternoon is the safest window. Mornings can bring frost and wet roofs, and ladders on slick surfaces are the biggest avoidable risk. Late afternoon brings fading light, so good crews stop well before sunset.
Weather will move your date at some point, so plan for it:
- Reserve alternate dates when you book, not after the first cancellation.
- Ask the installer about their weather policy, including how rescheduling is handled.
- Expect cancellations for high winds, snow or ice, and wet roofs.
The calendar is a safety control as much as a planning tool. Daylight, dry connections and stable ladder footing all depend on it.
What safety and materials checks come before installation?
Before anything goes up, someone has to confirm the lights and the power source are safe. Ask who does that and who supplies the materials.
- Use lights listed by an independent lab such as UL or ETL, and make sure they are rated for outdoor use, as Massachusetts fire-safety guidance recommends.
- Check every set and extension cord for broken sockets, frayed wires or cuts, and discard damaged sets, as a CPSC news release advises.
- Plug outdoor lights into GFCI-protected receptacles or a portable GFCI unit, keep connectors off the ground and avoid overloading outlets.
- Ask for documentation that the materials meet these standards.
The CPSC states that seasonal lighting lacking minimum wire size, strain relief or overcurrent protection presents a substantial product hazard. That is why we inspect strings before they are hung, not after something trips.
Property managers working across several buildings can also review these low voltage safety tips when planning circuits.
How do you book and what should you confirm?
Bring this list to the consultation and get the answers in writing:
- A written scope that states the install window, the activation date and the removal window.
- Who supplies the lights, and whether in-season repairs are included.
- Proof of insurance and the cleanup policy.
- Whether the installer provides GFCI protection or you need an electrician first.
- A weather contingency date.
Property managers should add an access and power review, plus a plan for coordinating with tenants and visitors on install day.
Pro Tip: Send photos of the roofline, trees and outlets before the consultation. A good estimate starts from what the crew will actually see.
How do you maintain the display and fix problems after installation?
A professional install should run all season, but small problems still happen. Know what to check so a dark section does not sit unfixed for weeks.
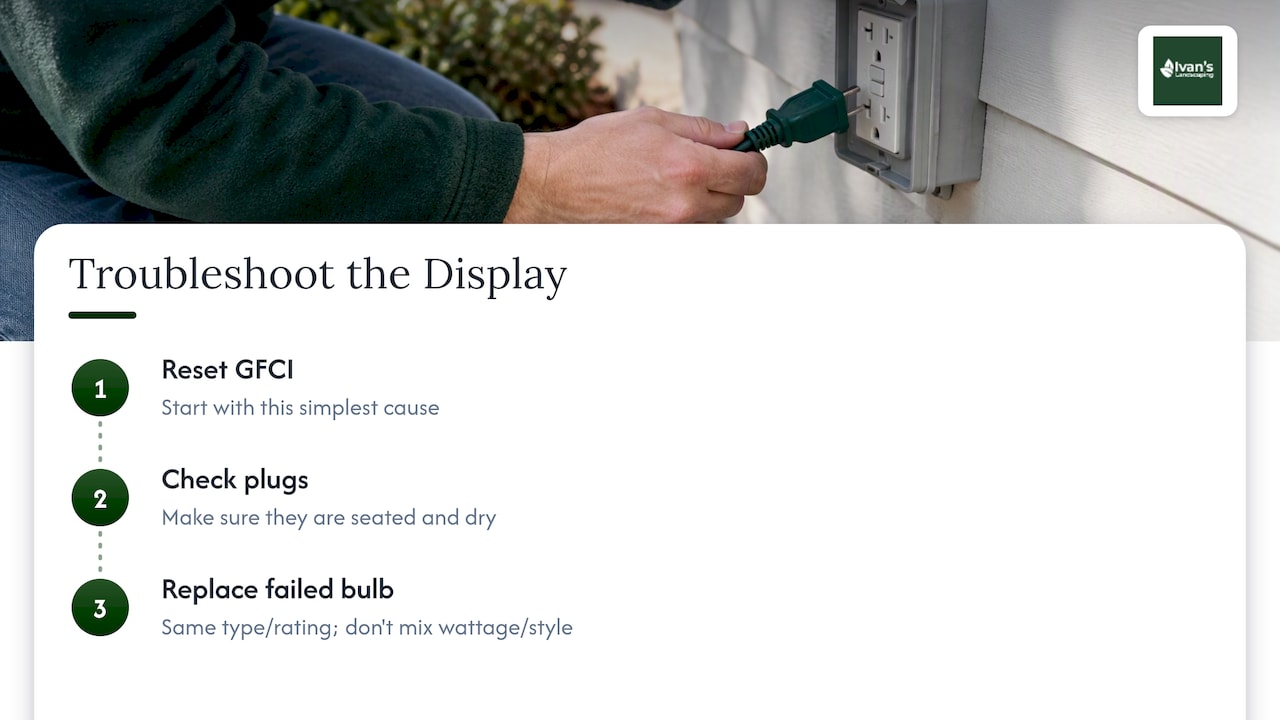
Start with the simplest causes. A strand that goes out is usually a loose connection, a burned-out bulb or a tripped GFCI. Reset the GFCI first, then check that plugs are seated and dry. If a single bulb has failed, replace it with the same type and rating, and never mix sets that differ in wattage or style. Our primer on C7 versus C9 lights explains how bulb sizes differ, which helps when you are matching replacements.
Wind and snow can pull clips loose. Wires that droop or lie on the ground should be secured promptly, because hanging cords catch on branches and wet connectors cause trips. Do not climb onto an icy roof to fix them yourself. Call the installer and use the in-season service you confirmed in your scope.
Walk the property at night regularly. Looking at the display from the street shows dark sections, flicker and sagging runs that you will not notice in daylight. Note them and report them in one batch so the crew can fix everything in a single visit.
Finally, keep the timer or controller dry and accessible, and check that it still matches your activation and shut-off schedule after any power outage.
What should you prepare before installation day?
A little preparation turns a long day into a short one. Work through this checklist the week before:
- Trim back branches or shrubs that block access to rooflines and trees, or ask us to include it in the scope.
- Clean the gutters, since clips usually attach there and debris slows the crew.
- Test your outdoor outlets and confirm they are GFCI protected. Trip them and reset them so you know they work.
- Locate any lights you already own and test each strand. Set aside anything with cracked sockets or frayed wires.
- Move cars, ladders, trash bins and holiday storage out of the work area.
- Decide where you want the controller or timer, and confirm the activation date.
- Secure pets indoors and tell everyone in the household when the crew is coming.
- Review the written scope one more time, including the removal window.
Property managers should add two items: notify tenants of the install date and any outdoor access changes, and confirm who holds the keys to meters, panels and locked areas. Those two steps prevent the most common delays on multi-building properties.
If a deck, patio or railing is part of the display, check how it will be lit. These deck lighting ideas cover safety and style for low-level lighting, which pairs well with a roofline plan.
Which energy-efficient lighting options are worth considering?
LED lights are the practical choice for most homes. Massachusetts guidance notes that LED replacements run cooler and use less electricity, which means lower heat near dry greenery and a lighter load on your circuits. That also lets you run longer strands on one outlet without pushing it close to its limit.
Efficiency also depends on how the product is built. The ENERGY STAR draft specification for decorative light strings describes testing criteria for qualifying strings, including lifetime and accelerated weathering tests, along with labeling requirements and limits on watts per lamp. Choosing strings that meet standards like these is a good sign they were built to last more than one season.
If you are weighing LEDs against traditional bulbs, our guide to LED versus incandescent lights covers energy use, heat and what to expect on brightness.
A few habits stretch the benefit further. Put the display on a timer so it runs only when people can see it. Reuse sets that still test well, and store them wound on a spool, not balled up, so the wires survive the next season. Fewer replacements means less waste and a lower cost over time.
Environmental care also applies to the installation itself. Crews should use clips that do not damage trees or siding and remove everything at takedown, so no stray wire or plastic is left behind to blow around the yard or wrap around a branch.
How should you dispose of or recycle old lights?
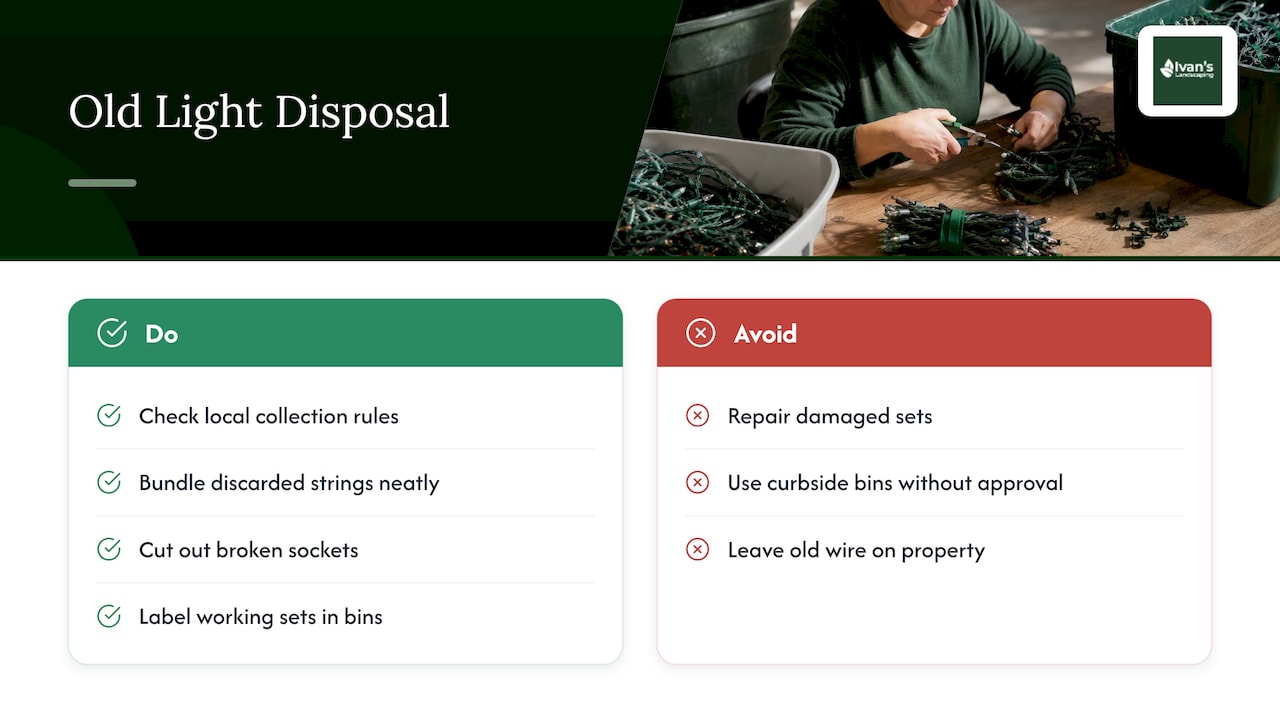
Do not toss a damaged set in the trash and forget about it. Start by deciding whether it is truly finished. If a set has cracked sockets, frayed wires or cuts, the CPSC advises discarding it instead of repairing it, since a bad cord is a real hazard.
Before you throw anything out, check whether your local waste hauler or village offers a holiday light collection or recycling drop-off. Program timing and accepted materials vary. Rules vary by community, so call your hauler or check its website. Do not put light strings in curbside recycling bins unless the program explicitly accepts them, because the wire can jam sorting equipment.
When you do have to discard a set, bundle it neatly so it does not tangle and snag. Cut out any broken sockets to prevent someone from reusing a dangerous set after it leaves your home. Keep working bulbs and sets in labeled bins so you know what to bring out next season.
If we remove and replace your display, ask us what happens to retired strands. We confirm the removal window and cleanup in the written scope, so no old wire is left on the property.
Planning this step in advance makes takedown easier and avoids untangling and guesswork.
Why do we recommend early planning and documented scopes?
Book your estimate in September or October. That timing gets you your preferred dates and the widest choice of designs, and it keeps installs ahead of the late-season rush. Installing before your chosen activation date also reduces rooftop work in cold, dark conditions, which is safer for the crew and for your property.
A documented scope is the other half of the answer. When the install window, activation date and removal window are written down, nothing is left to memory in the busiest weeks of the year. We stand behind our work with a satisfaction guarantee, and we leave clean job sites.
— Chas
Ready to schedule your holiday lights?
We install holiday lights for homes and commercial properties in McHenry County, backed by free estimates, a satisfaction guarantee and clean job sites. Request your free estimate, share photos and your preferred activation date, and confirm the removal window in writing. Start at our holiday lights service page or reach us through Ivanslandscaping.
FAQ
How early is too early to put up Christmas lights?
Installing in October is common for professional crews, as long as the lights stay off until your chosen activation date. Putting lights up early lets crews work in better weather. Just confirm the activation date and your community’s rules.
Do you start at the top or the bottom when lighting a tree?
Most people start at the top and work down, so the plug end finishes near the outlet and the strands stay evenly spaced. Check each set for damage first, and use only sets rated for the location, outdoors or indoors.
How much does it cost to hire someone to hang Christmas lights?
Cost depends on scope: the size of the roofline, the number of trees, the lights used and whether removal is included. We provide free estimates, and pricing is available on request after we see the property.
How do professionals install Christmas lights?
Crews walk the site, mount clips along rooflines and trees, run wiring to a GFCI-protected source, test every strand and walk you through the result. They install during daylight and stop before sunset. Inspecting materials first keeps the display safe all season.