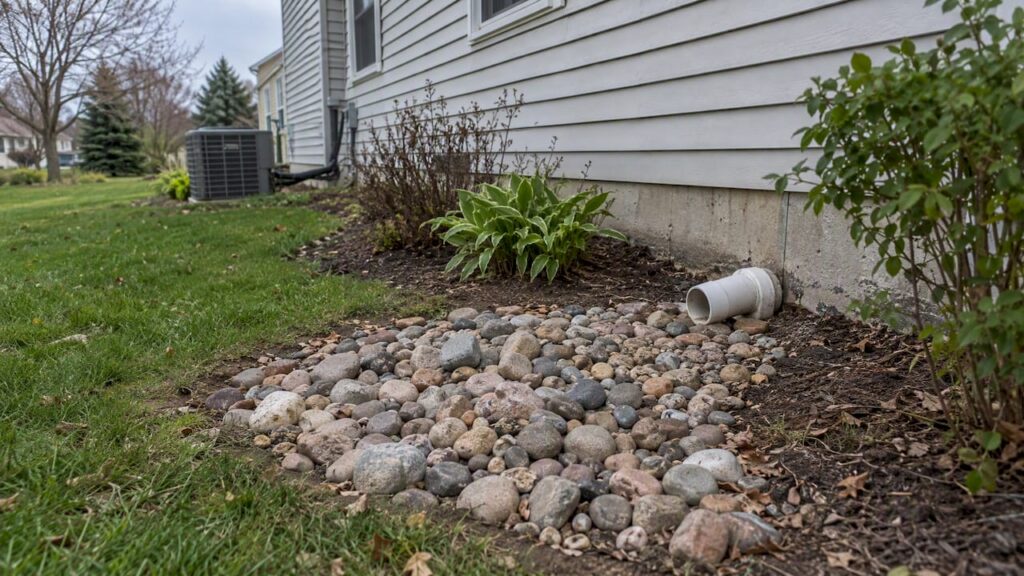
The most reliable approach is to route sump discharge to a stable outlet at least 10 feet from your foundation, then dress that outlet with a landscape treatment such as a gravel splash bed, pop-up emitter, or rain garden where soil conditions allow infiltration. For regrading, dry wells, or larger infiltration work, hiring a landscaper makes the job faster and protects your yard from erosion while keeping the pipe out of sight.
TL;DR:
- Keep a minimum 1% slope on buried pipe, and use solid pipe near the house before switching to perforated pipe farther out for infiltration.
- Choose a rain garden only after testing soil drainage and groundwater depth; limit ponding to 8 inches and keep it at least 25 feet from wells.
- Check local rules before work: sump lines generally cannot connect to sanitary sewers, and outlets must stay on private property without crossing a boundary.
- In cold climates, bury pipe below the frost line or insulate exposed sections; a quarter inch weep hole near the pump drains trapped water.
- For regrading, dry wells, or permitted work, hire a landscaper and request a site assessment, flow sketch, written scope, and clear permit responsibility.
Table of Contents
- Practical discharge methods for routing your sump pump water
- Landscaping and concealment techniques that pair with discharge routing
- Siting, grading, and code basics to check before you change discharge
- Freeze protection and winter tips for sump discharge
- When to hire a pro and what a solid proposal should include
- A landscaper’s view on sump discharge done right
- How we can help with your sump discharge landscaping
- FAQ
- Sources
Practical discharge methods for routing your sump pump water
Most sump systems rely on a rigid PVC line, typically 1.5 or 2 inches in diameter, run at a gentle downward slope away from the house. The pipe should empty at a point where water can spread out and soak in without pooling near the foundation or running back toward your basement.
A few proven methods cover most yards:
- Extend the rigid pipe to a low point in the yard, keeping a steady downward slope so water never sits in the line.
- Add a pop-up emitter at the pipe’s end, which stays flush with the lawn and only opens under water pressure, hiding the outlet when the pump is idle.
- Install a dry well or infiltration pit where soil drains well and groundwater sits deep enough, giving discharge a place to disperse underground. A dry well sized correctly can handle most of the discharge from a single home when soil permeability and groundwater depth allow it.
- Use a french drain or exfiltration trench when you need to move water across a longer distance and let it seep out gradually, rather than burying a solid pipe that dumps at one spot.
- Bury the line with solid pipe near the house and perforated pipe farther out, keeping the transition below the frost line in cold regions so freeze-thaw cycles do not crack fittings.
- Consider a rain barrel or small cistern to capture and reuse a portion of the flow for garden watering, though this works best as a supplement rather than your main discharge path.
Our guide on downspout drainage sizing covers similar pipe and slope decisions that apply directly to sump lines.
Pro Tip: Keep at least a 1% slope on any buried run so water keeps moving instead of sitting in low spots and freezing.
Landscaping and concealment techniques that pair with discharge routing
Once the pipe has a destination, the next step is making that destination look intentional. A rock or gravel splash bed at the outlet absorbs the force of discharged water and keeps soil from washing away; a bed roughly 3 to 4 feet wide and 4 to 6 inches deep, filled with 1 to 2 inch river stone, handles most residential flow rates.
Plants tolerant of intermittent soaking, such as switchgrass, blue flag iris, or red-twig dogwood, work well planted just outside the splash zone rather than directly in the outlet path, where constant flow can uproot young roots.
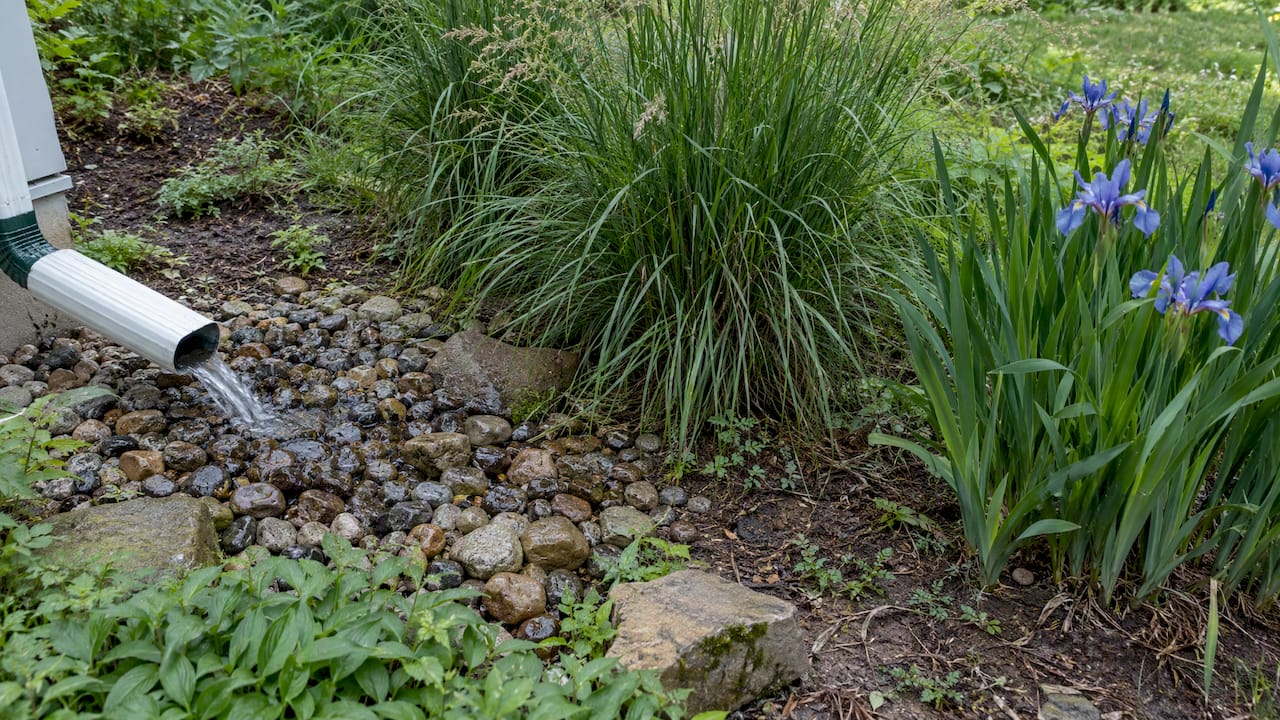
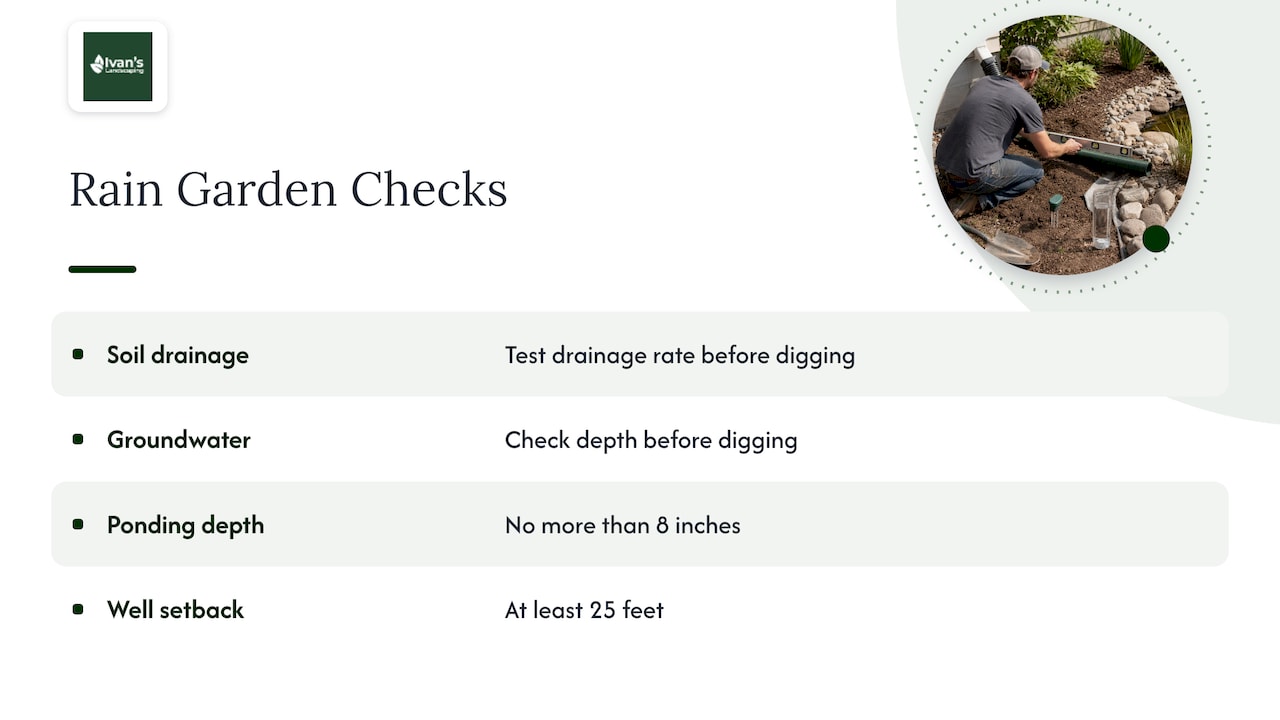
A rain garden is a shallow planted depression built to capture runoff and encourage infiltration, and it can double as a landscaping feature rather than a utilitarian drain. Before digging one, check three things: a soil test for drainage rate, the depth to groundwater, and distance from your foundation and any well. Design standards recommend keeping ponding depth to no more than 8 inches and maintaining at least a 25-foot setback from any well, since a closer rain garden risks hydraulic connection to the water supply.
For a more finished look, mulch beds, metal or stone edging, and a few well-placed boulders can frame the outlet without drawing attention to the pipe itself. Homeowners pairing drainage with a paver patio often route discharge along the patio’s edge; our page on paver patio drainage shows how slope and base prep work together there.
Maintenance stays simple: clear leaves and debris from the splash bed each fall, check the emitter flap for grit buildup each spring, and rake gravel back into place after heavy storms.
Siting, grading, and code basics to check before you change discharge
Before moving or rerouting a discharge line, confirm the basics that keep water away from your house and away from your neighbor’s yard. Infiltration features like dry wells and rain gardens should sit at least 10 feet from the foundation, a separation EPA’s on-lot treatment guidance recommends to avoid directing water back toward the basement. Grade the ground to slope away from the house at roughly 1% or more, a standard we cover in detail in our grading around foundations guide.
Check your municipal code before finalizing a plan:
- Sump discharge should never connect to the sanitary sewer; many cities, including Roseville, Minnesota, prohibit this outright and require discharge to terminate on private property.
- Some municipalities allow temporary sewer discharge permits during winter months when surface discharge would freeze, but this is the exception, not the rule.
- Pick an outlet point that won’t send water across a property line or onto a sidewalk, since that can create a dispute with neighbors or the city.
- Larger infiltration systems, engineered trenches, or anything touching a right-of-way typically need a permit; a quick call to your local building department clarifies what’s required.
Freeze protection and winter tips for sump discharge
Cold climates add a wrinkle: a frozen discharge line can back water up into the pump and cause it to burn out. A small weep hole, about a quarter inch, drilled into the discharge pipe near the pump protects against this by letting trapped water drain back instead of freezing solid, a detail covered in University of Minnesota’s onsite sewage guidance.
- Bury the exterior line below the frost line where practical, or wrap exposed sections with heat tape in harsher climates.
- Build in an overflow path, such as a slightly lower secondary outlet, so a large storm doesn’t overwhelm a dry well or rain garden.
- Check the discharge point before the first freeze each year and clear any ice or debris from the emitter.
Pro Tip: If your line runs above ground for any stretch, that section is the one most likely to freeze first, so prioritize insulating or burying it.
When to hire a pro and what a solid proposal should include
Extending a pipe or adding a splash bed is reasonable DIY work for most homeowners. Regrading a slope, digging a dry well, installing a large french drain, or anything requiring a permit is better handled by a landscaper who knows local soil conditions and code.
- Ask for a site assessment that notes your yard’s slope, soil type, and existing drainage patterns.
- Request a grading sketch or simple drawing showing where water will flow after the work is done.
- Get a written scope listing materials, pipe sizes, and total cost before work starts.
- Confirm who handles permits if the job requires one.
- Ask about a workmanship guarantee, and treat a missing site plan or verbal-only scope as a red flag.
Drainage and grading work often overlaps with other projects, like paver patios or full landscape redesigns, where the same contractor can handle both.
A landscaper’s view on sump discharge done right
The sump discharge problems we see most often trace back to pipes that dump water a few feet from the foundation, right where it seeps back toward the basement. Balancing function and looks isn’t complicated: a splash bed or rain garden costs far less than fixing a foundation crack. For readers managing drainage alongside basement waterproofing, A-1 Basement Waterproofing’s grading guidance offers a useful complementary perspective on keeping water moving away from the house.
— Chas
How we can help with your sump discharge landscaping
Routing water away from your home takes the right grade, the right outlet, and a yard that still looks good afterward. We handle drainage and grading solutions, paver patios, and full landscape design and install projects that tie a discharge outlet into the rest of your yard.
- Free estimate with a written scope before any work begins
- Grading and drainage work paired with design, patios, or planting
- Ongoing maintenance plans to keep the system clear year after year
- A satisfaction guarantee on completed work
Reach out through Ivanslandscaping to schedule a site visit and get a plan for your yard.
FAQ
What are the code requirements for sump pump discharge?
Most municipal codes prohibit connecting a sump pump to the sanitary sewer and require the discharge line to terminate on private property rather than a public right-of-way, as shown in Roseville, Minnesota’s sump pump code. Some cities permit temporary sewer discharge in winter under specific conditions, but this requires a separate permit and isn’t the standard approach.
Where should my sump pump discharge to?
Discharge should go to a stable point in your yard, away from the foundation and property lines, such as a splash bed, dry well, or rain garden that lets water soak in gradually. On-lot treatment options like infiltration trenches and bioretention areas work well when sited at least 10 feet from the foundation.
Can I bury my sump pump discharge?
Yes, burying the line is common practice, using solid pipe closer to the house and perforated pipe farther out where infiltration is intended. In cold climates, bury the line below the frost line or add a weep hole near the pump to prevent freeze-related damage, as recommended by University of Minnesota’s onsite sewage program.
How do I hide a sump pump discharge pipe outside?
A pop-up emitter keeps the outlet flush with the lawn and closed except when water flows, while a gravel splash bed with plantings around it conceals the end of the pipe entirely. Mulch beds, boulders, or edging placed around the outlet also blend it into the surrounding landscape.
Is a rain garden a good option for sump pump water?
A rain garden works well when your soil test shows reasonable drainage and groundwater sits deep enough to avoid standing water, with design standards capping ponding depth at 8 inches. Keep any rain garden at least 25 feet from a well, and skip this option if your soil drains too slowly to handle the volume.
Sources
- WISCONSIN DEPARTMENT OF NATURAL RESOURCES TECHNICAL STANDARD RAIN GARDEN 1009
- NPDES: Stormwater Best Management Practice, On-Lot Treatment (EPA)
- Pump supply lines: To drain or not to drain? | Onsite Sewage Treatment Program (UMN)
- Sump Pumps | Roseville, MN – Official Website